How To Clean Loose Lay Vinyl Flooring? (Explained)
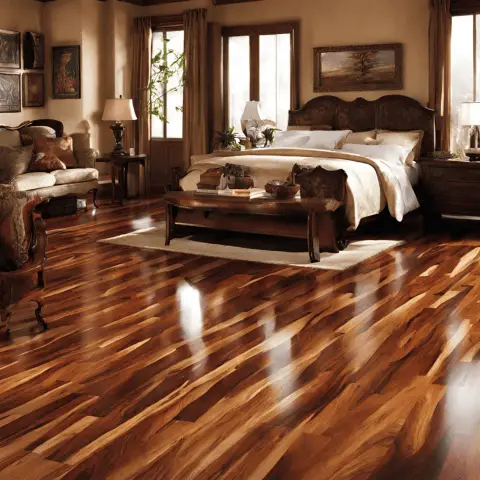
Loose lay vinyl flooring has become a popular choice for homeowners due to its durability, affordability, and easy installation. However, like any flooring material, it requires regular cleaning and maintenance to keep it looking its best. In this guide, we’ll walk you through the step-by-step process of effectively cleaning loose lay vinyl flooring to ensure its longevity and aesthetic appeal.
Quick Summary
| Step | Action |
|---|---|
| 1. Remove Loose Debris | Sweep or vacuum flooring thoroughly using a soft brush attachment to avoid scratching loose lay planks. |
| 2. Prepare Cleaning Solution | Mix warm water with a pH-neutral, vinyl-safe cleaner (e.g., diluted dish soap or 2026 eco-gel formula); avoid harsh chemicals or ammonia. |
| 3. Damp Mop Gently | Wring microfiber mop until nearly dry, then mop in the direction of the planks; use minimal water to prevent seepage under edges. |
| 4. Spot Treat Stains | Apply vinyl-specific stain remover (e.g., baking soda paste or smart nano-spray); gently rub and rinse with damp cloth. |
| 5. Dry Thoroughly | Wipe with a dry microfiber cloth or towel; allow air drying completely to avoid moisture buildup and edge lifting. |
| 6. Maintenance Tip | Use felt pads under furniture; avoid steam cleaners, excessive water, or abrasives for longevity in 2026 smart-home setups. |
Gather Supplies
Alright, before you dive into cleaning that loose lay vinyl flooring, round up your toolkit so you’re not hunting around mid-mess. Grab a broom or vacuum for the quick sweep, a microfiber mop or soft cloth for gentle wiping, pH-neutral cleaner mixed into warm water in a bucket. If spots are being stubborn, a soft-bristle brush, splash of white vinegar, or mild dish soap can work wonders—totally optional, but they’ve bailed me out more times than I can count.
Preparing the Area
First off, shove all the furniture and clutter aside so you can get to every inch of that vinyl without playing obstacle course. Grab a broom or vacuum next and whisk away the loose dirt and grit—trust me, skipping this means scratches galore and a floor that looks beat before you’re done.
Routine Cleaning
1. Dust and Dirt Removal
First off, grab a broom or fire up the vacuum to sweep away all that loose dirt and grit from your loose lay vinyl floor. Hit those corners and edges extra hard—grime loves crashing the party in those spots, you know?
2. Damp Mopping
Grab some warm water and mix in a pH-neutral floor cleaner—keeps things gentle on your loose lay vinyl without stripping the finish. Dip a microfiber mop or soft cloth right in, then get to scrubbing that floor. Wring it out every couple passes so you don’t turn the place into a puddle; nobody needs soggy feet mid-clean. You’ll blast away dirt, grime, and those pesky stains in no time.
3. Rinsing (if needed)
Got any stubborn residue left after mopping? No biggie—just rinse with plain water. Wring that mop or rag out good and tight, then give the floor another quick once-over to chase away every last bit of cleaner. Skip it, and you’ll wind up with gunky buildup dulling your vinyl’s shine, turning that fresh look into something kinda sad real quick.
Deep Cleaning (as needed)
1. Stubborn Stains and Spills
For those stubborn stains or spills that laugh at plain water, mix up some warm water with a squirt of mild dish soap—nothing fancy, just your basic stuff. Dab it on the mess, and if it’s digging in its heels, grab a soft-bristle brush or scrub pad for a gentle nudge. Rinse everything off with clean water till it’s sparkling, then let it air dry. Your floors will thank you, no sweat.
2. Grease and Oil Stains (if applicable)
Grab some warm water and a squirt of mild dish soap—whip that into a bubbly mix. Slap it right on the stain, then scrub gently with a soft cloth; no need to go all aggressive. Rinse it super well afterward, or you’ll end up with that annoying soapy haze messing with your shiny floor.
3. Removing Scuff Marks (if applicable)
Grab a soft cloth, dab on some white vinegar, and give that stubborn scuff a gentle rub—it’ll lift right off without scratching up your vinyl. Rinse everything with plain water afterward, and boom, good as new. Scuffs hate vinegar, you know?
4. Residue from Adhesives or Tapes (if applicable)
Got some sticky adhesive gunk leftover on your loose lay vinyl? Soften it up first with warm water or a splash of rubbing alcohol—works like a charm. Grab a plastic putty knife and scrape gently; no need to go all aggressive or you’ll nick that smooth surface.
Drying and Final Steps
Let that loose lay vinyl air dry all the way—no shortcuts, or you’ll regret it later with trapped moisture. While you’re kicking back, eyeball the floor for any sneaky spots that dodged the clean. Looks perfect? Sweet, haul the furniture back in and scatter your stuff where it belongs.
Tips for Maintaining Loose Lay Vinyl Flooring
1. Throw down some sturdy doormats at every entrance—your vinyl will thank you by staying spotless longer, since nobody’s trekking grit or puddles inside.
2. Pop some felt pads under your furniture legs—seriously, it’s a game-changer for dodging those annoying scratches and scuffs while you shuffle stuff around. Skip it, and you’ll be kicking yourself when a chair leg gouges your shiny vinyl like it holds a grudge.
3. Steer clear of those gritty abrasive cleaners or scrub brushes—they’ll scratch up your vinyl like a cat on a screen door, and good luck fixing that mess.
Conclusion
Keeping your loose lay vinyl floors in top shape? It’s all about those quick, regular cleanups that stop dirt from doing real damage. Nail the steps in this guide, and I swear, they’ll sparkle like the day you laid ’em down—years from now, no grime in sight.
Always peek at your manufacturer’s instructions for your specific loose lay vinyl flooring—they know their stuff best. Treat it right, and it’ll stay gleaming, comfy underfoot, and full of that cozy style you love in your home.
Frequently Asked Questions
Can I use a steam mop on loose lay vinyl flooring?
No, steam mops are not recommended for loose lay vinyl. The heat and excess moisture can cause the planks to warp, lift, or separate at the seams. Stick to damp mopping with a well-wrung microfiber mop and a mild cleaner instead.
What’s the safest way to remove dirt and debris from loose lay vinyl?
Start with dry methods: sweep with a soft-bristle broom or use a vacuum with a hard-floor setting and brush attachment (no beater bar). This prevents scratching and pushes debris into seams where it can cause lifting if wet-cleaned first.
How do I clean tough stains like grease, pet urine, or marker from loose lay vinyl?
For grease: sprinkle baking soda, let sit 15 minutes, then wipe with a damp cloth and mild dish soap solution. Pet urine: blot immediately, clean with a 1:1 white vinegar-water mix, rinse, and dry thoroughly. Marker: use rubbing alcohol on a cloth, test in a corner first. Always dry completely to avoid edge lifting.
Is it okay to use a lot of water when mopping loose lay vinyl flooring?
No, excessive water is a common cause of buckling. Use a solution of warm water and a pH-neutral vinyl cleaner (like diluted dish soap), wring your mop until just damp (no puddles), mop in sections, and immediately dry with a microfiber towel or fan to prevent moisture seepage under edges.
What should I do if my loose lay vinyl lifts or buckles after cleaning?
Excess moisture is usually the culprit. Dry the area completely with fans or towels. Gently lift edges, dry underneath with a cloth, and use a hairdryer on low heat if needed. Press planks back down with a heavy roller or books overnight. Prevent recurrence by minimizing water and using edge seals if recommended by the manufacturer.
How often should I clean loose lay vinyl flooring, and what’s the best routine?
Sweep or vacuum daily in high-traffic areas to prevent grit buildup. Damp mop weekly with minimal water. Deep clean monthly by moving furniture, vacuuming seams, and spot-treating stains. Regular dry maintenance extends life and keeps seams tight—forum users report less lifting with this schedule.
Are harsh cleaners like bleach, ammonia, or abrasive pads safe for loose lay vinyl?
No, they can discolor, etch, or degrade the vinyl surface and adhesives. Opt for manufacturer-approved cleaners or gentle alternatives like diluted vinegar (1:10 ratio) or commercial vinyl floor soaps. Avoid scrub brushes; use soft cloths or microfiber mops to prevent scratches and seam damage.