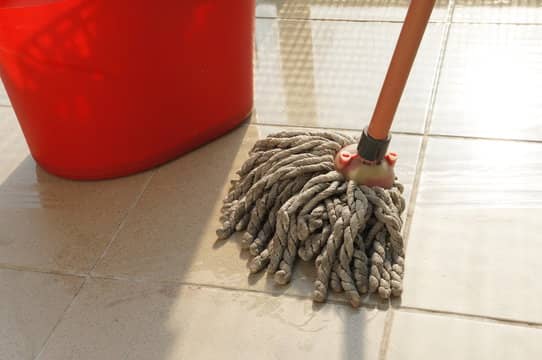
How To Store Wet Mop (+Prevent Gems & Bacteria)
To store a wet mop properly, clean the mop head after each use, wring it thoroughly, and allow it to completely dry before storing. Store the mop with the head up and in a well-ventilated area to prevent bacteria and mildew growth.
Like a carefully preserved gem, a wet mop must be stored with utmost care to prevent the growth of bacteria and maintain its effectiveness.
In this article, we will explore the proper techniques for storing a wet mop to ensure its longevity and hygienic qualities.
By following these guidelines, you can keep your mop in pristine condition, ready to tackle any cleaning task while minimizing the risk of bacterial contamination.
Key Takeaways
- Thoroughly clean and rinse the mop head to remove dirt, debris, and residual detergent.
- Ensure the mop is completely dry before storing to prevent mold and mildew growth.
- Wash the mop head in a washing machine with hot water and detergent to eliminate bacteria.
- Store the mop in a well-ventilated and dry location, away from direct sunlight, and use suitable storage options such as hooks or wall-mounted holders.
Once you’ve conquered that floor with your wet mop, don’t just toss it in a corner like yesterday’s laundry—bam, instant bacteria hotel. Rinse it under hot water right away, twisting out every drop until it’s just damp, not dripping. Hang it up in a breezy spot, maybe over the shower rod or on a dedicated hook, so it dries fully overnight. Skip stuffing it back into that dark bucket; moisture’s the enemy here, you know? Do this every time, and your mop stays fresh, ready to tackle the next spill without growing its own science experiment.
Once you’ve tackled the floors with your wet mop, don’t just chuck it in a bucket and call it a day—that’s a fast track to a slimy germ fest. Rinse it good under hot water, wring it out tight, and hang it up to dry completely. Your next clean-up will thank you, no funky smells or bacteria lurking around.
Alright, now that your mop’s dripping disaster is under control, let’s tackle storage so those nasty germs don’t throw a party. Here’s my go-to routine:
Clean and Rinse the Mop
Before tossing that soggy mop in the corner, clean and rinse it right—it’s your frontline defense against turning the closet into a germ rave. Squeeze out the gunk under hot water, scrub with a bit of soap if it’s extra nasty, then hang it to drip-dry completely. Skip this, and yeah, bacteria throws a party you won’t like cleaning up later.
First off, shake out and rinse that mop head really well to ditch all the loose dirt and grime—trust me, skipping this just invites a germ party later.
Make sure you rinse away any leftover detergent grime too—that stuff’s basically a welcome mat for bacteria and germs if you let it linger. Trust your mop’s health on it!
Oh, and here’s the real game-changer: let that mop dry out completely before you stash it away. Skip this step, and you’re basically inviting mold and mildew to crash the party—total germ fest waiting to happen. Your mop stays fresh, tough, and ready to tackle spills next time.
Preparing the mop for storage
Before you tuck that wet mop away, rinse it super thoroughly and let it air dry completely—no damp rags in the closet, or you’ll end up with a funky petri dish situation. Keeps germs and bacteria from throwing a party.
Once you’ve given your mop a solid rinse after cleaning, chuck it straight into the washing machine with hot water and a squirt of detergent. That steamy cycle nukes the germs hiding out—no sense storing a soggy bacteria bomb, you know?
This quick rinse blasts away any leftover grime or gunk still clinging to your mop head—keeps those sneaky bacteria from throwing a party in storage.
Oh, and dunk that soggy mop head in a bucket of soapy water—it’ll wipe out those lurking bacteria like a champ. No more gross surprises next time you grab it!
After scrubbing that mop clean, hang it up or lay it flat to dry out completely before stashing it away. Soggy ones turn into germ hotels real quick—you don’t want that nasty surprise next time you grab it.
Dry that mop head and handle completely—no half-measures, or you’re basically throwing a germ rave in your closet. Soggy spots are their favorite hangout, trust your gut on this one.
Clean and dry your mop head really well before you stash it—that’s the key to dodging nasty germs or spreading gunk onto your spotless floors next time around. Trust me, a soggy mop is basically a bacteria party waiting to happen.
Thoroughly cleaning the mop head
First off, don’t just wring out your wet mop and call it a day—that’s how you end up with a bacteria party in your closet. Grab some hot soapy water, give the head a solid soak, then scrub every fiber like you mean it. Rinse until the water runs clear, squeeze out the excess, and let it air dry completely before storage. Boom, floors stay fresh, no gross surprises later.
Start by giving that mop head a solid squeeze or wring to ditch the extra water—no one wants a drippy disaster turning your storage spot into a bacteria party.
Next, dunk the mop head into a bucket of warm water spiked with your go-to cleaner—something germ-busting, you know? It’ll shake loose all that stubborn gunk and dirt, saving you from a soggy, stinky mess later.
Just swish that mop head around in the solution nice and easy—get every strand soaked so no germs crash the party later.
After giving the mop a good shake, rinse the head under plenty of fresh, cold water till it’s squeaky clean. Cold does the trick best—hot stuff can sometimes lock in those germs, and nobody wants that mess lurking in storage.
After rinsing it off, give that mop head a good squeeze to wring out every last drop of water. Soggy mops are basically bacteria hotels—you don’t want that drama in your closet.
Hang up that mop head somewhere airy and let it dry out completely before chucking it in with your brooms and cleaners. Soggy storage? Total recipe for gross bacteria parties—no thanks!
Follow these steps, and your mop head comes out sparkling clean—no dirt, gunk, or sneaky residue hanging around to breed bacteria and wreck your fresh floors. Nobody wants a mop that’s basically a germ hotel, right?
Rinsing off any excess dirt and detergent
You gotta rinse off all that leftover dirt and soap from the mop head—it’s your best defense against turning it into a germ hotel. Skip it, and good luck with that funky smell next time you pull it out.
This step blasts away any leftover gunk that could turn your mop into a dirt-repelling slacker next time. Nobody’s got time for a wimpy wipe-down, you know?
Work in a spot with good airflow, like near an open window or with a fan going. Those cleaning solution fumes build up quick in stuffy rooms, and I’ve gotten dizzy more than once forgetting that—don’t be me.
Ever skip rinsing your mop and end up with a science experiment in the bucket? This table shows exactly why it’s worth the extra 30 seconds.
| Situation | Result |
|---|---|
| Not rinsing off excess dirt and detergent | Mop head remains dirty and less effective |
| Rinsing with clean water | Mop head becomes clean and ready for use |
Just rinse that extra dirt and soap off your mop head real quick. Keeps it fresh way longer, and stops those sneaky germs from throwing a bacteria bash in there—who needs that headache?
Plus, it nixes those nasty smells from mop water sitting idle in your cupboard—you know, the kind that hits you like a wall when you grab cleaning supplies. No more funky kitchen vibes!
Properly drying the mop before storage
Dry that mop out good before tossing it in storage—no one needs a soggy nightmare turning into a bacteria party in the closet. It’ll keep things fresh and fight off those nasty microbes, saving you from that funky smell next cleaning day.
Once you’ve rinsed away the leftover grime and soap, hang that mop up to dry out completely—no shortcuts, or you’ll end up with a nasty germ hotel in your closet.
Hang that soggy mop up in a spot with decent airflow, like near an open window or fan. It’ll dry out way faster than you think, starving out those germs and bacteria before they crash the party.
Hang it up like that, and air gets to swirl all around the mop head—drying out that moisture in no time flat, so bacteria doesn’t get a chance to crash the party.
Or just lay that soggy mop flat on a spotless counter or hook it up to a drying rack—super simple, and it’ll air out fast without breeding a germ apocalypse in your closet.
If your mop’s machine-washable, just chuck it in for a quick gentle spin with plain water first. It’ll shake off the grime and cut down on that sneaky bacteria buildup before you hang it up to dry—way better than letting it fester, right?
That’ll scrub away any leftover gunk, you know, for a legit deep clean that keeps germs from crashing the party later.
Oh, and don’t forget the bucket if you’ve been mixing up floor cleaners in it—give it a solid rinse to scrub away all that gunky residue, then let it air dry completely. Trust me, skipping this is how you end up with a science experiment nobody asked for.
Once your mop’s fully dried out, hang it up or stash it somewhere with tons of breathing room. Cramming it into a tight corner? Big no—no one wants that damp nightmare turning into a bacteria breeding ground.
That’ll trap all that nasty moisture, and before you know it, mold’s throwing a party in there—nobody wants their mop turning into a science experiment.
Grab a clean bucket or a bag made just for mops—it’ll keep dust and grime from turning your wet one into a bacteria playground. Nobody’s got time for that mess.
So yeah, wring out and air-dry your mop completely before tossing it away—it’s the smartest move to keep it fresh and stop those gross bacteria from throwing a party.
Just hang up that soggy mop and let some fresh air work its magic, or give it a solid shake and wring first. You’ll squash those nasty germs and bacteria before they throw a party, plus your mop stays fresh and ready for the next mess way longer.
Disinfect the Mop

You gotta disinfect that wet mop right after every use—no skipping this step, or you’re basically rolling out the red carpet for germs and bacteria to crash your clean home.
Grab a solid disinfectant cleaner made for killing germs, and hit that mop hard—it’ll wipe out any sneaky pathogens still hanging around. No way you’re storing a bacterial petri dish, right?
Give that mop time to fully disinfect—no shortcuts, or you’re basically handing germs a free pass for next time. Hang it up dry and ready to tackle the next mess without any nasty surprises.
Importance of disinfecting after each use
Disinfect your wet mop regularly, or those germs and bacteria will throw a party in there. Seriously, hit it with some cleaner after every use to keep things fresh and your floors safe.
Skip disinfecting your mop, and you’re just begging those nasty germs to hitch a ride back onto your floors—nobody wants that kinda surprise party.
Hey, to keep those nasty germs and bacteria from throwing a party in your wet mop while it’s stored, your cleaning crew needs to nail these steps:
- Use an appropriate cleaning fluid or solution specifically designed for mops.
- Clean the mop after each use to prevent the accumulation of dirt and contaminants.
- Pay attention to all parts of the mop, including the handle and head.
- Store the mop in a clean and dry area to prevent bacterial growth.
- Regularly inspect and replace worn-out mops or cleaning rags.
Stick to these habits, and you’ll squash germs while dodging slips everywhere—from your kitchen counters to busy offices or even hospitals. Nobody needs that mop drama turning into a real mess!
Plus, storing your wet mop the right way stops cross-contamination dead in its tracks and keeps your whole cleaning routine on point—no more letting germs hitch a ride around the house.
Using suitable cleaning agents for disinfection
Grab the right cleaners to zap those germs on your mop before you store it—trusty disinfectants are your secret weapon against turning that closet into a bacteria breeding ground. Skimp here, and you’ll regret it next time you pull it out smelling like a science experiment gone wrong.
Nobody wants their mop turning into a slimy germ hotel, right? Skip proper disinfecting after use, and those nasty microbes throw a party, spreading contamination across your floors and potentially giving you or your family a bout of the runs. Yikes.
Your cleaning crew better stock up on the right cleaners that play nice with your wet mop gear—otherwise, you’re just inviting a bacteria blowout when you stash it away. Nobody wants that funky smell sneaking back next time you pull it out, right?
If you’re scratching your head over the best disinfectants to nuke those germs lurking in your wet mop, just ping a cleaning pro. They’ll steer you straight to stuff that actually works—no more playing germ roulette in your storage bucket.
Oh man, bathrooms and those crazy-busy spots like hallways? They’re germ central. That’s why you gotta store your wet mop smart—pick the right cleaners upfront to keep bacteria from throwing a party in there later.
Storing your wet mop the right way is a game-changer for dodging those nasty germs and bacteria buildup—nobody wants a mildew party in the bucket, right? Just wring it out good, hang it in a breezy spot to dry fully, and boom, your home stays fresh without the funk.
Allow time for the mop to be fully disinfected
Give your wet mop enough time to fully air out and zap those germs dead—skip this step, and you’re basically rolling out the red carpet for bacteria to crash the party next time you clean.
Skipping this step is a recipe for disaster—those wet mop heads turn into a germ fiesta if you let ’em sit around, breeding bacteria like nobody’s business.
Keep these pointers in mind before stashing that soggy mop away—your floors (and nose) will thank you.
- Endwet mop heads: These disposable mop heads are designed to be tossed after each use, eliminating the risk of cross-contamination.
- Mopping robots: These automated devices can effectively clean and sanitize floors without human intervention, reducing the chances of bacterial growth.
- Commercial cleaning equipment: Investing in high-quality equipment such as steam cleaners or UV sanitizing systems can help achieve thorough disinfection.
- Color-coded cleaning system: Implementing a color-coded system for different areas or surfaces ensures that mops used in restrooms, for example, are not used in food preparation areas.
Stick to these tips, and you’ll slash the odds of nasty bacteria hitching a ride across your floors. Nobody wants that surprise funk, right?
Just use those handy gallon lines molded right into your bucket—super easy. Nail the water level, then add the exact capfuls of cleaner the label calls for per gallon. It’ll crank up the disinfecting power big time, wiping out germs before they crash your mop storage party.
Choose the Right Storage Area
Let’s dive right into why choosing the right spot for your soggy mop is a game-changer—get it wrong, and you’re rolling out the red carpet for germs and bacteria to crash the party next time you clean.
Skip humid bathrooms or sweltering garages when stashing your wet mop—those spots basically roll out the red carpet for bacteria and germs to party on the fibers.
Oh yeah, stash your mop away from direct sunlight—those UV rays are brutal and will chew through the fibers over time, leaving you with a floppy disaster.
Selecting an appropriate storage space
Pick the right spot to stash your wet mop, or you’ll end up with a germ party nobody invited. Keep it somewhere airy and dry to stop those nasty bacteria from multiplying like rabbits.
Before you toss that dripping mop into some random corner, pick a storage spot wisely—you’ve got a few key things to weigh, like airflow and easy access, or you’ll end up breeding a germ party nobody wants.
Pick a spot with good airflow and no dampness—wet corners are basically a free-for-all for bacteria, and nobody wants that stink show.
Keep that wet mop far from your kitchen or any spot where food hangs out—nobody wants germs sneaking into dinner, right? I’ve seen too many kitchens turn into petri dishes from lazy storage.
Hang that wet mop up off the floor with some sturdy hooks or a rack made for the job. No point letting it sit in a puddle of grime, picking up even more crud when you’re trying to fight off germs.
Grab a solid mop like the Casabella Spin Cycle with its bucket, or swap in some microfiber strips—they wring out way better, speed up your scrubbing, and keep those germs from multiplying while your mop dries out. No more sketchy bacterial hideouts lurking in soggy corners!
Nobody wants their wet mop turning into a bacteria hotel, right? Pick a smart storage spot using these tips, and you’ll slash those germ risks while keeping your cleaning routine fresh and fuss-free.
Avoiding areas with high humidity or temperature
Pick a cool, dry spot to store your wet mop—no steamy bathrooms or hot garages, okay? Heat and humidity are like a VIP invite for bacteria and germs to go wild, so dodge ’em to keep things fresh and sanitary.
Ugh, leave your mop soaked and forgotten like that, and it’s basically rolling out the red carpet for germs and bacteria. They’ll party hard, wrecking the mop’s cleaning power and risking some nasty health issues for you and your family.
Store that soggy mop somewhere dry and not too humid—think basement corner on a chill day, not your steamy bathroom. Keep the temps moderate too; nobody wants their mop bucket turning into a petri dish for bacteria.
Pick a spot with decent airflow—you don’t want your wet mop stewing in a stuffy corner, inviting mold and mildew to set up shop.
Keep your wet mop out of direct sunlight—those string fibers can turn brittle and snap like dry spaghetti if they bake all day, and any plastic bits or markings on the handle will fade faster than your motivation to clean on Mondays.
Stick to these tips, and wet mopping turns into a no-fuss chore that actually keeps germs and bacteria from staging a comeback—your floors will thank you!
Keeping the mop away from direct sunlight
And don’t tuck your wet mop away from the sun—let it bask in some direct sunlight! Those UV rays are like a free germ-zapping laser, drying it out fast and wiping out bacteria before they can multiply like crazy.
Don’t leave your wet mop baking in direct sunlight—that heat turns the dampness into a prime bacteria breeding ground before it has a chance to dry out.
Stash that soggy mop in a closet or dim storage room—no direct sunlight, okay? It keeps bacteria from throwing a wild growth party, since heat and rays just egg ’em on. I’ve skipped this step before and regretted it big time.
Keep your mop out of direct sunlight— that’ll bleach the color right out and chew through those fibers before you know it. Nobody needs a mop looking like it lost a fight with the bleach aisle.
Keep your mop out of direct sunlight—it’s a game-changer for dodging germs and making the thing last forever. No crispy fibers or sneaky bacterial parties.
Nested bullet point list:
- Sub-list 1:
- Feeling secure knowing that harmful bacteria are less likely to thrive
- Peace of mind regarding cleanliness and safety at home
- Sub-list 2:
- Preserving the quality and effectiveness of the mop for an extended period
- Avoiding unnecessary expenses on frequent replacement
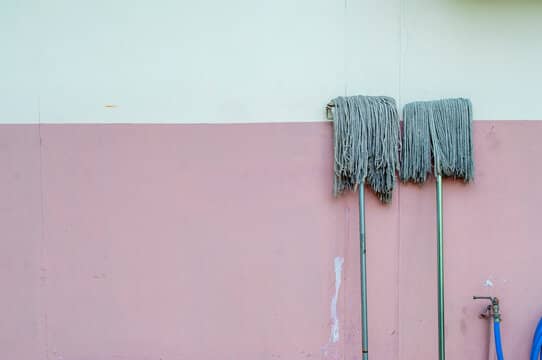
Hang or Store the Mop
Let’s chat about smart ways to stash your wet mop without inviting germs to crash the party. Hanging it up lets air circulate like a champ, or you can stand it upright in a bucket—both keep things fresh and drama-free.
Hanging your wet mop lets it dry out fast, which stops mold and mildew from turning it into a fuzzy nightmare. Nobody’s got time for that gross science project lurking in a soggy bucket, you know?
Hang that wet mop on the wall with some sturdy clips or hooks—it’s a total game-changer for tight spaces and lets it drip-dry fast, keeping germs from crashing the party in your closet.
Different storage options (hanging, standing, etc.)
So, your mop’s still dripping from that deep clean? No sweat—here are a few smart spots to stash it without letting germs crash the party:
- Hanging them on hooks: This is a common method used by many individuals. It allows the mop to dry quickly, prevents germs and bacteria from spreading, maximizes space utilization, and keeps the mop off the floor, reducing the chance of further contamination.
- Standing them upright in a mop bucket: This is another viable option, especially if there is limited wall space available for mounting hooks or holders. However, this method may prolong drying time and result in an unpleasant odor due to moisture accumulation.
- Utilizing wall-mounted holders: Wall-mounted holders provide a convenient way to store wet mops while saving floor space. However, they may not be suitable for all situations depending on the availability of appropriate wall surfaces.
Bottom line, pick the storage setup that fits your space and routine—no magic bullet works for everybody.
Benefits of hanging the mop to avoid mold and mildew
Hang your wet mop up right after using it—lets air flow all around and dries it out fast, so mold and that gross mildew don’t stand a chance. Best part? This simple habit packs a ton of perks:
- Increased drying time: Hanging the mop ensures that it is exposed to air from all directions. As a result, moisture evaporates more efficiently, preventing the growth of mold and mildew.
- Prevention of foul odors: By allowing the mop to dry thoroughly, hanging it helps eliminate unpleasant smells caused by bacterial growth in damp conditions.
- Enhanced cleanliness: Properly dried mops are less likely to harbor germs and bacteria. Hanging them up prevents these microorganisms from thriving and spreading onto other surfaces.
Hang up that wet mop right after you’re done—it’s a game-changer for dodging mold, mildew, funky smells, and any creepy contamination creeping in. Your storage spot stays fresh, and you avoid that gross “forgot about it” nightmare.
Using mop clips or hooks for wall storage
Hang that soggy mop up on a hook to air dry—it’s a game-changer for dodging mold, mildew, and all those nasty germs, plus your mop’ll stick around way longer without falling apart on you.
Hang that wet mop up with some clips or hooks—it’s a game-changer for letting it dry out fast and dodging those nasty germs. No more soggy pile in the corner turning into a science experiment!
Wall-mounted mop holders are a total lifesaver—they keep things neat and let your wet mop air out fast, dodging those gross germs and puddles everywhere.
Just clip or hook that soggy mop up off the floor—it dangles there, air rushing around it freely. No more slimy floor contact means germs don’t get a foothold, keeping things fresh and bacteria-free. Way better than the usual puddle nightmare!
Storing your wet mop this way keeps it spotless and stops bacteria from throwing a party on those fibers—no one wants a science experiment lurking in their cleaning closet.
Set aside a go-to spot for your wet mop—it keeps your cleaning zone neat, frees up precious space, and stops that whole area from turning into a sloppy mess. Nobody needs to dodge a dangling mop head while scrubbing floors, right?
Just clip or hook your wet mop onto the wall—it’s a total lifesaver for letting it air out fast and stopping those germs from throwing a bacteria party in the corner. No more funky smells lurking in your utility closet!
Protect the Mop Head

Don’t let your mop head sit out collecting dust like some forgotten gym sock—it’s a fast track to germ city. Pop it in a breathable bag or hang it high up so crud doesn’t cake on, keeping bacteria at bay and your next clean streak spotless. Nobody’s got time for a grimy mop comeback tour.
Just slip a dedicated mop head cover over the wet part, or heck, even a sturdy plastic bag works in a pinch. That way, you trap all those nasty germs and bacteria before they turn your storage spot into a petri dish. No more funky smells sneaking up on you later!
Make sure you snap that cover on tight—nobody wants their mop head flopping around in the trunk or closet, spilling grime everywhere and inviting more bacteria to the party.
Covering the mop head to prevent dust accumulation
Toss a cover over your mop head when it’s chilling between uses—it keeps dust bunnies and sneaky germs from turning it into a petri dish. Way easier to grab and go next time without that extra grime fight.
Dust floating around your place loves to stick right to that soggy mop head, dragging germs and bacteria along for the ride—total recipe for trouble.
Cover that soggy mop head with a plastic bag or towel, and you slash the chances of dust floating around and turning it into a bacteria playground. Who needs extra crud lurking in there?
You’ll really want to nail this step in super dusty spots or when you’re scrubbing those finicky surfaces every day—trust me, skip it and you’ll end up with a germ party nobody invited.
Oh yeah, cover that mop head too—it’ll stay nice and damp way longer, dodging the whole quick-dry-out nightmare. No more crusty surprises next time you grab it!
Slap a cover over that soggy mop head, and you’ve got it staying fresh and fight-ready for the next mess. No more turning your storage spot into a germ party—keeps cross-contamination way down, you know?
Using a mop head cover or a plastic bag
Just slip a plastic bag or mop cover over that soggy head—no more dust piling up, and it’ll stay fresh without breeding extra germs in the corner.
Grab a cover for that soggy mop head right away—it’s like a force field keeping dust and grime from hitching a ride and turning your storage spot into a germ breeding ground. No one wants that nasty surprise next clean-up!
Especially if you’re tucking that soggy mop away in a dusty garage or workshop—all that floating grit and junk just loves crashing the party and breeding extra bacteria. Yikes, right?
Yeah, slip a breathable mesh bag over the whole mop head for that extra shield against dust and grime. No point sealing in moisture— that’ll just invite bacteria to crash the party while you’re not looking.
Plus, toss a plastic bag or cover right over that damp mop head. It seals things up tight, starving out those nasty germs and bacteria before they can multiply and turn your closet into a science experiment gone wrong.
Stick to these steps, and your wet mop stays fresh, germ-free, and raring to go next time—no funky smells or surprise bacteria parties. You’ll thank me when scrubbing feels effortless again.
- Benefits of using a cover or plastic bag:
- Minimizes exposure to dust particles
- Prevents germs and bacteria growth
Securing the cover properly to avoid slipping
Snap that mop cover on tight so it doesn’t go sliding around while you’re stashing it in the closet or lugging it to the laundry room. Nobody’s got time for a rogue mop head turning your trunk into a slime fest!
Do this right, or you’ll deal with leaks everywhere—and that cover won’t do squat against germs and bacteria. Nobody wants a soggy mess turning into a science experiment, right?
Just slap on some Velcro straps or those nifty adjustable clips to lock that cover down tight—no more floppy mop heads spilling germs all over your closet. Keeps things tidy without the hassle, you know?
Those fasteners clamp right onto the mop head for a rock-solid hold—no slipping or shifting while it dries out. Keeps the mess contained and germs at bay, you know?
Or just loop a sturdy knot around the mop handle—bam, that cover stays locked on tight and won’t budge while it dries. Keeps those germs from sneaking back in, you know?
Make sure that cover hugs the mop head nice and snug—no floppy edges begging to slip off and turn your storage spot into a slippery mess.
Snap that cover on tight with these steps, and you’ll keep your wet mop fresh and germ-free while it’s tucked away. No more pulling out a slimy nightmare—your floors will thank you!
| Method | Advantages | Disadvantages |
|---|---|---|
| Velcro straps/adjustable clips | Provides a tight grip on mop head | May not be compatible with all covers |
| Tying a knot around handle | Secures cover tightly in place | Requires extra effort to tie and untie |
Label and Rotate Mops (if applicable)

If you’ve got more than one mop kicking around—hey, happens in busy homes or side hustles—slap a label on each one. Makes it dead simple to rotate them during use and storage, so none turns into a bacterial hotspot from constant abuse. Even wear means less grime buildup, you know?
Rotate your mops like a pro—swap ’em out so no one’s taking all the abuse. That spreads the wear evenly, keeps ’em kicking longer, and ensures your floors get that reliable sparkle everywhere, without any gross bacterial hideouts from overworked ones. Smart move, right?
For commercial settings with multiple mops
In spots like offices or restaurants juggling a bunch of mops, you can’t let germs crash the party by piling ’em together. Just carve out a dedicated shelf or cabinet for each one—keeps things clean, simple, and yeah, way less gross in the long run.
Keep different mops for different spots around the house—no sense dragging bathroom grime into the kitchen, you know? Just slap a label on each one, like “kitchen duty” or “bathroom beast,” and you’ll dodge those annoying mix-ups every time.
Nothing worse than grabbing your mop for a quick scrub and getting hit with that funky mold smell, huh? Let it dry out completely first—no shortcuts there. Flip it upside down on a hook or rack so water drains off and you sidestep all that nasty bacteria and germ party. And hey, keep your storage spot spotless by checking it regularly and wiping down any grime before it turns into a science experiment.
Put these storage tricks to work in your busy commercial setup with a bunch of mops, and you’ll slash the odds of germs hitching a ride everywhere. Keeps your team and customers safe from that nasty bacterial mess—nobody wants their workspace turning into a petri dish, you know?
Labeling each mop for identification
If you’re dealing with a bunch of mops in a restaurant or office, slap some labels on ’em—color codes or numbers work great. Otherwise, you’ll mix up the cafeteria disaster with the bathroom beast, and boom, germs party everywhere.
Just slap a label on every mop—a number, color tape, or even a Sharpie scribble. You’ll never mix up the kitchen warrior with the bathroom beast again, dodging those nasty germ swap-outs that turn storage into a bacteria party.
That way, you or the kids can snag the right mop for whatever mess you’re tackling—no more rummaging through that damp pile in the garage and grabbing the wrong one, which just spreads germs everywhere. Trust your gut on this one; it’ll save you a headache.
Label your mops with a quick tag or color code—trust me, it’ll make tracking their dirty deeds a breeze. You’ll spot when one’s overdue for a good scrub, a bleach soak, or the heave-ho before it turns your floors into a germ rave.
Bottom line, smarten up your wet mop storage—like hanging it high to dry fully—and you’ll crush germs and bacteria before they multiply. Keeps your cleaning routine zippy, hygiene spot-on, and cross-contamination? Yeah, not happening on your watch. Easy fix that saves headaches.
Implementing a rotation system to ensure even usage
Rotate your mops like you’re running a fair game—no one’s getting stuck with the nasty one every time. Grab a marker, slap a number or goofy name on each handle, and cycle through ’em on a simple weekly schedule. That way, nothing wears out too fast or turns into a bacteria hotel from overuse, especially in a busy home or shop. Keeps everything fresh and fighting fit.
Rotating your mops like this keeps germs from setting up camp on just one poor guy—way cleaner floors, no drama. Jot down which one’s on deck right now and when you last grabbed it; a quick note on your phone works wonders. Oh, and give ’em a once-over every couple weeks—spot those frayed strings or funky smells early, and toss the beat-up ones before they turn your routine into a mess.
Rotating your mops is a total game-changer—you squeeze way more life out of ’em, keep ’em fresh and clean, and slam the door on germs hitchhiking across your floors, whether at home or in a bustling shop.
Regular Maintenance

Keep your mop in fighting shape so it stays effective and doesn’t crap out on you too soon. Hit it with a solid cleaning routine on the regular, swap it out when it’s looking ragged, and give it a quick once-over for frayed edges or other damage—trust your eyes, it’ll save you headaches later.
Want your mop to last way longer? Store it properly and handle it like it’s not disposable—I’ve saved tons of mine from early retirement that way, keeping germs and grime at bay without the gross factor.
Schedule for regular cleaning and replacement
Look, nobody wants their mop turning into a petri dish of germs and bacteria. Stick to a quick clean after every use, and swap it out every couple months—your nose (and floors) will thank you big time.
Look, keeping your wet mop fresh goes way beyond a quick rinse after each scrub-down. Whip up a solid routine for deep cleans and sanitizing—tweak it based on how often you grab it, the floors you’re hitting, and that stubborn grime buildup. Skip this, and you’re basically inviting a germ party in your bucket.
Look, nobody wants their wet mop turning into a soggy germ factory in the corner. Rinse it good with clean water right after mopping, then hang it up somewhere breezy to dry out completely—damp mops are basically bacteria buffets. Swap it out every few months too, or it’ll lose its mojo and let grime win.
Stick to a routine when storing your wet mop—it keeps the thing in fighting shape for scrubbing floors like a champ, without letting germs throw a rave in there. Skip it, and you’re just asking for trouble, you know?
Inspecting the mop for any signs of wear and tear
Give your mop a quick once-over before stashing it—look for frayed strings, holes, or anything sketchy. A beat-up one won’t scrub right and could turn into a bacteria hideout, you know? Spot the damage early, and you’ll keep those floors germ-free without any nasty surprises.
Before tossing your soggy mop in storage—where germs love to party—give it a solid once-over like this:
- Check for fraying or loose threads on the mop head.
- Examine the handle for cracks or other signs of damage.
- Assess the overall cleanliness of the mop head, ensuring it is free from debris or residue.
- Look for discoloration or foul odors, which may indicate bacterial growth.
- Inspect any attachments or mechanisms, such as wringers or clips, to ensure they are functioning properly.
Keep an eye on your mop heads for fraying fibers or grimy buildup, and swap out anything sketchy the second you spot it. I’ve ruined too many floors ignoring that stuff—keeps your gear fresh, fights off those sneaky germs, and yeah, your home stays way less disgusting.
Tips for extending the mop’s lifespan
Want your mop to stick around longer? Rinse off all the grime and debris right after you use it, then let it dry out completely before stashing it away. Skip that, and you’re just begging for a bacteria fiesta—nobody’s got time for that nasty surprise.
Don’t go Hulk mode on your mop—scrub gently to keep those fibers from shredding too soon. And yeah, skip the brutal chemical cleaners; they’ll trash the material faster than a toddler with scissors.
Check your mop now and then for frayed edges or other damage—spot it early, and you can fix it before it turns into a bigger mess. Pop it in a cool, dry spot too, and you’ll keep mold from taking over while it stays in fighting shape longer.
Stick to these tips, and your wet mop stays fresh and ready to tackle messes for way longer—no gross germs or bacteria crashing the party on those fibers. You’ll thank me when it doesn’t turn into a science experiment overnight.
How to Store Wet Mop for a Long Time
Types of Wet Mops
You grab a mop to scrub floors spotless or blot up those sneaky wet spills and mystery liquids that turn your kitchen into a slip-n-slide. Nobody wants that soggy mess hanging around breeding germs, right?
You’ll run into three main types of wet mops out there, depending on the grime you’re battling or just your cleaning style—string, sponge, or microfiber, each with its own quirks for staying fresh and germ-free.
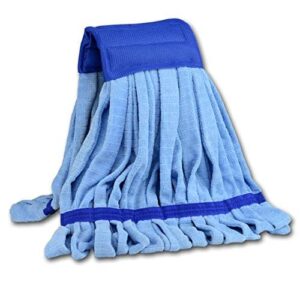
You’ve got three main types of wet mop heads to wrangle: the classic cut-end ones that shed fibers like crazy if you’re not careful, looped-end heads built for heavy-duty looping back on the handle, and those microfiber wonders that grab grime without leaving a soggy mess behind. Each one’s a pain to store wrong, but we’ll sort that out.
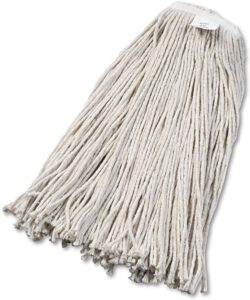
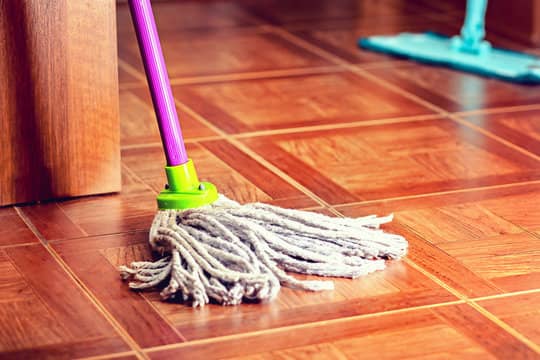
Cut end wet mop head
Cut-end wet mop heads? They’re everywhere for a reason—they’re dirt cheap and you can just chuck ’em when they’re nasty. Beats fussing over reusables, especially when you’re battling germs after a good floor scrub.
Those bargain-bin wet mops soak up spills like nobody’s business—super absorbent, right? But good luck tackling anything bigger than your kitchen floor; they barely cover a decent patch. And they’re total throwaways: flimsy as heck, falling apart after a few swipes, with zero chance of surviving the laundry. Skip ’em if you want something that lasts.
Looped wet mop head
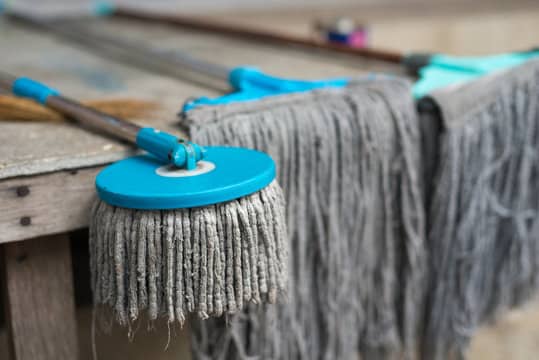
Looped wet mop heads nail that sweet spot—you get solid durability without the hefty price tag. Those loops let air flow through, so they dry way faster than flat ones, keeping germs and bacteria at bay when you’re hanging them up to store.
That’s why folks rave about looped-end wet mops over those ratty cut-end heads—they rinse cleaner, last forever, and don’t turn your storage bucket into a bacteria breeding ground. No more fuzzy nightmares shedding everywhere!
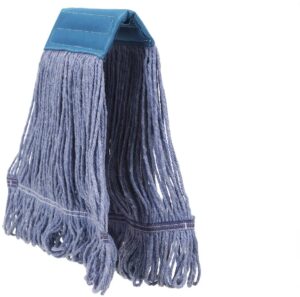
Go for looped-end wet mops—they won’t shed strings everywhere on your floors like those cheap cut-end ones. Hang ’em up by the loops after rinsing, and you’ll dodge that nasty thread unraveling that traps moisture and invites bacteria to party while stored.
Machine wash these bad boys separately from cotton or polycotton looped mops—no sense risking a lint explosion or sneaky bacteria hitchhikers, you know? Keeps everything fresh for storage.
Microfiber wet mop head
Hands down, microfiber mop heads rule for wet mopping—they dry crazy fast and trap grime without turning into a bacteria hotel when you hang ’em up to store. Skip the cotton ones; those stay soggy forever and stink up your closet.
These mop heads are typically polyester and polyamide blends that snag every tiny speck of grime like a champ. Just toss ’em in the wash after you’re done, or those sneaky germs will throw a party you don’t wanna host.
Hang your wet mop heads up to dry right after use—no damp pile-up in the corner, or you’ll breed a germ fiesta. These reusable ones bounce back for dozens of scrubs without shredding, and they’re skin-friendly too, keeping allergies at bay even after heavy action.
Those microfiber wet mops are absolute sponges—they suck up liquids up to seven times their own weight. Handy for scrubbing floors, sure, but that’s why you gotta store ’em bone-dry or risk turning your closet into a bacteria party.
Microfiber wet mops? Total lifesavers for quick spills—they’re crazy lightweight and zip around like nobody’s business. But don’t even try tackling that baked-on gunk in the garage; they’re not built for the heavy-hitting stuff.
Grab some smart accessories for your wet mop—they’ll keep it neatly stashed, rinsed off fast, and out of your way, so you avoid those sneaky germs and don’t end up slipping on a soggy floor. Total lifesaver for busy homes like yours.
Skip proper storage for these, and you’re basically inviting mold parties.Color-coded wet mop heads are a total game-changer for keeping your home spotless—they’re killer at stopping germs and bacteria from hitchhiking onto other surfaces and causing cross-contamination chaos.
Heads up—storing dry mops is a totally different game, you know, no wringing or mold worries there.
15 Tips to take Care and Storage of Dirty wet mops
Mops are your best buddy for scrubbing floors spotless—a long wooden or metal handle with that trusty cloth head soaking up grime like nobody’s business.
Nobody wants their wet mop head turning into a germ fiesta just because you skipped a quick rinse before stashing it away—or worse, after dragging it across the floor. Give it a solid scrub both times, and you’ll dodge that nasty bacteria buildup like a pro.
Look, nobody wants their wet mop turning into a slimy germ factory lurking in the corner. You’ve gotta clean it thoroughly, keep up with maintenance, and store it right to dodge that nasty mess.
You know those mops you’ve just dragged across the kitchen floor, still dripping and caked with grime? That’s exactly what I mean by wet dirty ones—the kind you haven’t rinsed or hung up yet, just begging for mold and bacteria to crash the party.
#1
Listen, that grimy wet mop of yours needs a good scrub, some TLC, and smart storage—before you even start swabbing, right in the middle of the job, and definitely after you’re done. Skip that, and you’re basically inviting germs to party on it, plus you’ll trash the mop way too soon. Nobody’s got time for a bacteria hotel in their cleaning closet!
#2
Before you fire up that mop for the next round, give the head a solid rinse in warm water—it’ll flush out any lingering chemicals so you’re not just smearing them around. Nobody’s got time for that kinda cleanup fail.
Always rinse your wet mop thoroughly before hitting a new spot. You don’t want to drag over leftover chemicals or grime from that greasy garage floor onto your spotless kitchen—could spell trouble for your family or wreck the surfaces, you know? Keeps germs and bacteria from hitching a ride too.
#3
Don’t twist the mop head when you’re dunking it into the wringer—that sneaky move just traps water deep in the fibers, turning your mop into a bacteria hotel. Push down nice and steady instead; it’ll squeeze out way more moisture so it dries faster and stays fresh. Trust your storage game on this one!
#4
Get into the habit of giving your mop some love right after you use it—rinse it thoroughly, wring it out, and hang it up to dry completely. Skip that step, and you’re just begging for a germ fiesta nobody wants.
Right after mopping, grab some dish soap and give that mop head a solid scrub, then rinse it under fresh running water till it’s squeaky clean. Skip this, and you’re basically inviting a bacteria bash in your storage spot—nobody’s got time for that mess.
There you have it—your mop’s now totally germ-free and stripped of every last bit of grime. No sneaky bacteria lurking around to ruin your next clean!
#5
After mopping up that mess, dunk the grimy mop head in a bucket of warm water for a few minutes. It’ll loosen all the stuck-on gunk, making it way easier to scrub clean and rinse off—keeping those germs from crashing your storage space later.
Plus, you don’t want those harsh cleaning chemicals soaking into your grimy mop head—that’s just begging for extra bacteria to crash the party next time you mop.
#6
Don’t soak a grimy mop head in water overnight—or even for hours, really. You’ll just turn the dang thing into a bacteria buffet, and nobody wants that mess spreading around their floors.
Nobody wants their mop turning into a gross bacteria breeding ground. Leave it soaking in water too long, and bam—mold, mildew, and all sorts of funk start partying in there. Worse, it chews right through those mop fibers, leaving you with a floppy mess that barely picks up dirt.
#7
Once you’ve given your mop a good scrub and let it air-dry a tad, just hang it up by the head—upside down, you know? That way, water drips off instead of sitting there, inviting mold or a bacteria party. Way better than stuffing it in a bucket where it turns gross overnight.
#8
Steer clear of bleach on your microfiber wet mop, whether you’re using it or tossing it in the wash. That harsh stuff shreds the fibers fast, and trust me, replacing a ruined mop mid-cleaning spree is no fun.
So, when washing your microfiber wet mops—or any mop head, really—grab a disinfectant. It’ll nuke those germs and bacteria before you stash ’em away, saving you from that funky smell later. Nobody wants a mop rebellion in the closet.
Every now and then, give your mop head a quick soak in warm, soapy water—it keeps things plush and stops those germs from throwing a party while bacteria crash it. Crusty mops are the worst, right?
#9
After giving your mop a good wash, just hang it outside by the door to soak up some sun. Those UV rays will nuke the germs and bacteria while it dries—way better than letting it mildew in a bucket somewhere dark and damp.
#10
Don’t cram your soggy mop head into a cupboard, sack, or even a stuffy little room—that’s just begging for a moldy bacteria explosion, and nobody’s got time for that cleanup nightmare.
Hang your wet mop in a roomy spot with plenty of airflow—no squishing it into a damp corner like last time. It’ll dry out quick, dodging that gross germ party nobody invited.
#11
Don’t toss your wet mop head back in the bucket or let it slump against the floor—that’s just begging for germs and bacteria to throw a rave. Hang it up high to air dry instead; your nose will thank you later.
#12
Washing your wet mop right keeps it kicking for way longer—no joke. Slow down and really scrub those strands deep; it’ll save you from a gross bacteria takeover later.
#13
If you’re throwing that grimy mop head in the washing machine, yank it off the handle first—saves the pole from getting trashed and lets it actually get clean, zapping those nasty germs for good. I’ve ruined one before; lesson learned the hard way.
Procedure for Proper Mopping
- Proper arrangement of intended mopping areas.
- Sweep the Intend mopping area lightly before mopping.
- Open the windows or doors to allow natural air circulation in the mopped areas or air conditioning as the case may be.
- Always place caution signals around when mopping to avoid accidents
- Avoid wet mopping. Mop in a way to ensure that the area mopped will get dried easily
- Mop any area in the ‘figure 8’ pattern to ensure proper cleaning of the area mopped
- After mopping, remove all caution signals and arrange the mopped areas
- Use the appropriate type of wet mop head for a designated area.
Frequently Asked Questions
How often should I clean and rinse the mop?
How often should you rinse that soggy mop? It really hinges on how hard you’re scrubbing, your floor type, and the grime level—kinda obvious, right? But do yourself a favor and give it a thorough wash after every single use. Skimping lets germs crash the party and multiply like crazy.
What type of disinfectant should I use to disinfect the mop?
Wanna keep your mop from turning into a germ hotel? Hit it with a disinfectant packing at least 70% alcohol, or whip up a 1:10 bleach solution—works like a charm to wipe out bacteria and stop any sneaky regrowth. No more nasty surprises next clean-up!
How can I prevent gems and bacteria from growing on the mop?
Nobody wants their mop turning into a germ party, right? Wring it out good, let it air dry completely till it’s bone-dry, spritz with disinfectant, and hang it in a spot that’s clean and gets plenty of breeze. That’ll keep the nasty bugs at bay—no science degree required.
Can I store the mop in a closet or does it need a specific storage area?
Yeah, tuck that wet mop into the closet—but only after it’s fully dried out, no shortcuts. Keep the spot spotless and bone-dry, or you’ll invite a gross germ party nobody signed up for.
How frequently should I replace the mop head?
How often do you need to ditch your mop head? It really hinges on the material and how beat-up it gets from your cleaning marathons. Cotton ones wear out fast—swap ’em every 3 to 6 months before they become a germ hotel. Microfiber? Those champs hold up way better, easily lasting a year or even longer if you rinse ’em properly after each go.
Final Words
Wet mops crush dirt like champs, leaving your floors sparkling and germ-free—until you slack on storage and let bacteria crash the party.
You’ve gotta master the right mopping techniques, pick from all the wet mop options out there, and get serious about cleaning, maintaining, and storing them properly—otherwise, you’re basically inviting germs and bacteria to set up camp.
Nobody wants a soggy, germ-infested mop lurking in the corner, turning your clean floors into a bacteria party. Here’s the deal: before you even touch it to mop, give that thing a solid rinse under hot water with a splash of vinegar to kill off any lurking crud. After you’re done, wring it out like your life depends on it—seriously, get every drop—and hang it up in a breezy, sunny spot to dry completely. Skip the damp bucket storage; that’s just asking for mold city. Boom, germ-free and ready for next time.
Bottom line, don’t leave your wet mop sitting there all grimy and gross—it’s a germ magnet. Rinse it thoroughly, wring it out, and store it right every single time to keep bacteria from throwing a party.