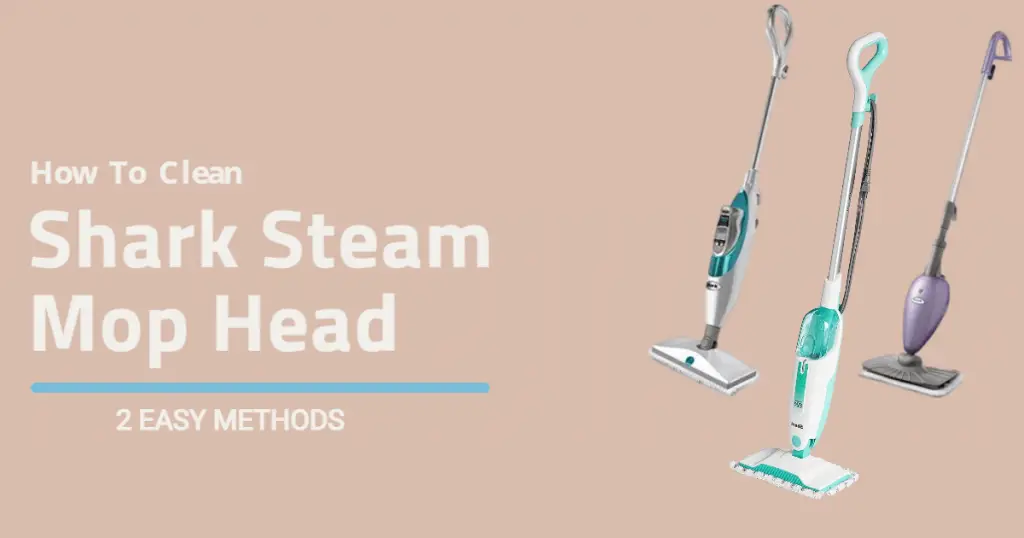
How To Clean Shark Steam Mop Head (2 Easy Methods)
To clean a Shark steam mop head, you can use two methods: Method 1 involves soaking the mop head in a vinegar solution for an hour, rinsing it, and letting it air dry. Method 2 requires machine-washing the mop head separately without fabric softeners or bleach, and then air or low-heat drying it. Regular cleaning is vital for maintaining the mop’s effectiveness, and you can choose either method based on your preference.
Shark steam mops are one of the easiest ways to get a sparkling floor. However, when is the last time you gave it a closer look?
When did you last clean it? Have you noticed your mop doesn’t seem to build up as much steam anymore?
Every Shark steam mop comes with a quick and easy-to-use head cleaning and renewing system.
The Shark Steam Pads and Tank Systems feature a disposable head attachment that slides onto the telescopic handle of your Shark Steam Mop.
Simply fill your tank with water, attach the pad to the head, and start steaming away.
When you’re done cleaning, just dispose of the head attachment and start over for a new clean pad next time!
Key Takeaways
- Regularly cleaning the mop head ensures sparkling clean floors and improves overall performance.
- Cleaning the mop head after each use and at least once a week prevents bacteria buildup and extends the lifespan of the steam mop.
- Thoroughly cleaning the mop head and preventing clogs increases steam efficiency and removes dirt and grime effectively.
- Proper maintenance, including rinsing the mop head regularly, inspecting for debris, and following manufacturer’s instructions, ensures continuous steam production and saves time and effort.
What Are Hard water scales in Shark steam Mop?
Ugh, that stubborn, crusty buildup on your Shark steam mop head? Total eyesore. Nothing more infuriating than spotting it right after you mopped the floors spotless just three days back.
And ugh, it’s a total pain when you can’t get to those tricky nooks, like the inside of your Shark steam mop—trust me, we’ve all been there cursing at it.
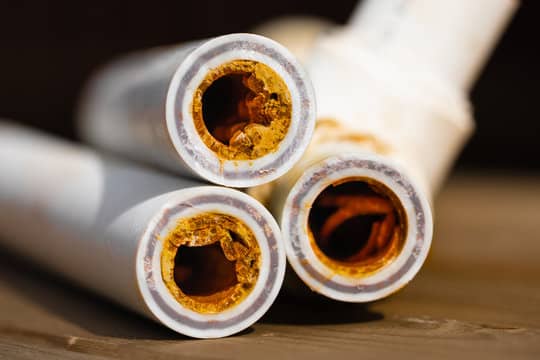
Ever notice those crusty white spots on your Shark steam mop head? That’s hard water scale, courtesy of minerals like calcium and magnesium hanging out in your tap water—they’re the real troublemakers that build up over time.
You know how tap water’s loaded with minerals? Fire it up in your Shark steam mop, and bam—those little troublemakers bond together, dumping crusty hard water buildup right on your mop head. Total pain, but super common if you’re in a hard-water area.
leaving you ready to chuck the mop across the room in total frustration. Those pesky hard water scales? They’ll wreck your Shark steam mop and slash its lifespan big time.
Hard water doesn’t just leave those crusty mineral spots in your tank for everyone to gawk at—it sneaks into the hoses too, causing all sorts of headaches down the line.
Ugh, the nooks and crannies inside the mop head are a total pain to spot and scrub compared to that big water tank—just dump and rinse it, no sweat, but down in the head? You’ll need a flashlight and some patience.
Over time, gunk clogs up those steam vents on your Shark mop head, so you end up with weak puffs instead of a proper blast. The pads turn into filthy rags too, just smearing grime around—total floor disaster waiting to happen.
which means you’ll burn through those mop pads way faster than you should—talk about a wallet killer!
Those minerals from hard water? They’ll wreck your Shark steam mop’s boiler over time—no kidding, it’s a pain to replace.
Replacement tanks are cheap and easy to snag online, but the boiler? Oof, that’s where your wallet takes a real hit.
Still scratching your head over whether hard water gunk is messing up your Shark steam mop head? That crusty white buildup is a total buzzkill—let’s sort it out quick.
Grab your Shark steam mop and eyeball those tricky corners where water just loves to pool up. Spot that hazy, foggy vibe? Boom—that’s your troublemaker right there, probably mineral gunk from hard water sneaking in.
Look, if you’re dragging out those old-school traditional mops instead of firing up your Shark steam mop, your floors won’t sparkle like they should—steam just kills it every time. On the flip side, at least you can toss those rags in the wash or recycle ’em when they’re totally beat.
Where to Begin?
Stick with distilled or de-mineralized water when firing up your Shark steam mop—tap water’s minerals are sneaky little buildup culprits that turn the mop head into a crusty mess faster than you can say “deep clean.”
Yeah, replacements can hit your wallet hard if you’re steaming floors daily—kinda like my endless battle with muddy paw prints.
Tap water’s your speedy, no-fuss pick and it usually gets the job done just fine. That said, no matter what kind you grab, you’ll wanna do some regular deep cleans to keep that mop head from turning into a science experiment.
Two Methods of Cleaning
- Unplug your steam mop and make sure it is 100% cooled off. If your mop is still warm it could cause you to get burnt. Water and electricity never mix.
- If it is possible for your mop model, take out the water tank. There are de-scaler products you can purchase at the grocery or home store. But a quick home remedy is 1 ½ ounce baking soda with one quart of clean distilled water.
- Allow your mop to warm up and stay heated for 1 to 2 hours.
- Then allow the tank to cool down completely. Before step number 5.
- Drain your unit. Try to ensure all the water is out of the tank before reassembly.
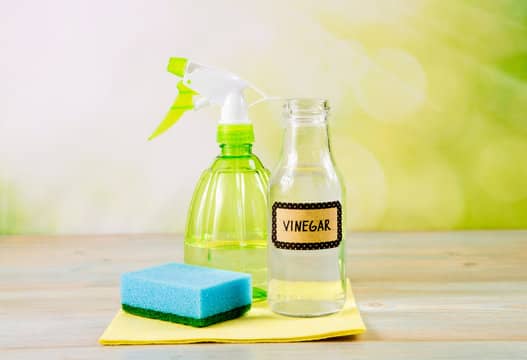
Vinegar and Water
Both methods follow pretty much the same steps, but if that first cleaner leaves behind those stubborn mineral scales from hard water, vinegar’s your secret weapon—it’ll dissolve the gunk like magic.
Vinegar’s a natural germ-buster, you know? That acidic kick slices right through the grime and buildup caked on your Shark mop head—no fuss, no harsh chemicals.
- unplug your steam mop
- Add in a solution of 2 parts water and 1-part vinegar. Some people who are sensitive to the vinegar smell may want a more diluted mixture.
- Let the mixture sit for an hour. This gives the vinegar a chance to clean the tank and hoses
- You can then heat your unit on the highest setting for at least an hour or however long you can handle the vinegar smell.
- Drain the tank after it has cooled.
Preventing Hard Water Scales
Look, scraping off that nasty hard water buildup is just tackling the symptom. Stop it from happening in the first place, and you’ll slash your scrubbing sessions while keeping your Shark mop pad in fighting shape for way longer—who wants to shell out for replacements every few months?
After every mop session, dump out that water tank—don’t skip it, or you’ll regret the funky buildup later. If your Shark lets you pop the tank off (most do), just grab a cloth and wipe away any leftover moisture for a bone-dry finish. Keeps things fresh and ready for next time!
Don’t go scrubbing the plastic parts of your mop head with anything rough or abrasive—you’ll scratch it up quick, and trust me, those marks turn into stain magnets overnight. Stick to soft cloths instead; your mop will thank you.
Those little scratches? They’ll dig in deeper and turn into a total pain to scrub off next time—don’t let ’em win!
What Not to Do
You might be at your wit’s end hearing hard water’s gunking up your Shark steam mop head too—it’s that sneaky villain messing with faucets, dishes, and yeah, even your cleaning gear.
If hard water’s gunking up your Shark mop head faster than you can say “spring cleaning,” it’s a dead giveaway you need a water softener. Seriously, it’ll cut through that mineral buildup nightmare and keep things sparkling without the endless scrubbing drama.
Skip softened water, okay? That softening system swaps out hard minerals for salt, and trust me, salt buildup in your steam mop’s boiler is a fast track to trouble—you’ll be scrubbing mineral gunk or worse, replacing parts before you know it.
Go with distilled water for your Shark steam mop—it’s a game-changer. Tap water leaves behind those pesky minerals that clog things up over time, and nobody wants a streaky floor or a mop head that’s seen better days. Grab a jug next time you’re at the store; your mop will thank you.
Other Tips to Ward off Hard Water Scales
After mopping, pop that Shark mop head off and let it dry out completely—no rushing it. Give it a quick wipe to knock off the grime, then just hang it up to air dry. And whatever you do, skip the store-bought cleaners; they can gum up the works and leave you with bigger headaches.
Steer clear of harsh commercial cleaners—they’ll chew right through those mop gaskets and leave you with leaks. Oh, and empty the water tank every single time, even if it’s just overnight. That standing water? It’ll cake up residue or sprout mold quicker than you’d think, and trust me, scrubbing black fuzz off your floors is no fun.
But you know what’s even more stubborn than those crusty hard water scales? The greasy grime and pet hair that gloms onto your Shark mop pads after a few rounds of floor duty—total nightmare fuel.
Every couple of months, give that mop head a solid deep clean—you’ll thank me later. While you’re in there, eyeball the water tank and any hoses on your model too; catching gunk or wear early keeps things running smooth without surprise breakdowns.
New Shark mop heads sometimes come out feeling stiff as a board straight from the package—you know, like they need a little TLC. No biggie; just toss it in a basin of warm, soapy water for 10-15 minutes, give it a good squeeze, and it’ll fluff right up, ready to tackle those floors.
5 Things You Should Consider While Taking Apart Shark Steam Mop
Taking apart your Shark steam mop? No sweat—it’s straightforward, but watch for these must-knows so you don’t end up with a messier mess.
Alright, before you dive in, pop that mop head off carefully—nobody wants to crack the handle and end up with a pricey paperweight instead of a cleaning champ.
After you’re done steaming away, hit those mop pads with a good wash every single time. Scrub off the gunk and dirt buildup—trust me, skipping this turns them into a grimy nightmare fast, and nobody wants that mid-clean.
Oh, and swap out those mop pads every few months or when they start looking ragged. Worn ones just can’t keep up, and you’ll love how much better your floors sparkle with fresh ones.
Oh yeah, scrub that mop head clean and descale it every few weeks—otherwise it’ll get all gunked up and leave you steaming mad.
Dismantling the mop
Alright, to really get in there and clean your Shark steam mop head, flip it over and unscrew those pesky fasteners on the bottom—takes like two minutes if you’re not fumbling around like I did my first time. Ready? Here’s the quick rundown:
- Start by unplugging your Shark Steam Mop and ensuring that it has completely cooled down.
- Locate the fasteners on the bottom of the mop head and use a screwdriver to unscrew them.
- Once all fasteners are removed, carefully lift off the mop head from the main body of the steam cleaner.
- After removing the mop head, you can detach the steam mop pads for cleaning or replacement.
First off, dump any leftover water from that handy removable tank and give it a good rinse—no sense starting with a soggy mess, you know?
Don’t dump harsh cleaners on your Shark steam mop—they’ll chew right through the components and leave you high and dry. Stick to mild soap; way less drama that way.
Follow these quick steps, and you’ll pop that Shark steam mop head right off for a solid deep clean or quick fix-up—no fuss, no drama.
Cleaning the mop pads
Once you’ve got the mop taken apart, dive right into those mop pads—they pick up all the grime, so don’t skip ’em or you’ll regret it next steam session.
First off, rinse those mop pads under some hot running water—it’ll blast away all the loose dirt and gunk in seconds, no elbow grease required yet.
Next, grab a sink or bucket and fill it with warm water—then squirt in a dab of dish soap. Gets those mop pads nice and sudsy without any fuss.
Drop those Shark steam mop pads right into the soapy water and give ’em a quick swirl—kinda like stirring up some mischief—to shake loose all that stubborn grime.
Once those pads have soaked for a few minutes, give ’em a solid rinse under clean running water. You don’t want sneaky soap bits lingering around to mess up your next steam session—trust your floors to stay spotless!
Give those mop pads a good squeeze to wring out the extra water—trust me, you don’t want drips everywhere. Then just let ’em hang out and air dry fully before snapping them back onto the head. Keeps everything fresh and ready for the next grime-busting session.
Stick to these steps, and your Shark steam mop pads will stay fresh, grime-free, and ready to blast through dirt every time you mop—no more half-hearted cleaning sessions!
Replacing mop pads
Look, those mop pads take a beating from all the steaming and scrubbing, so yeah, you’ll need to replace them eventually to keep things humming. If yours aren’t soaking up dirt like they used to or they’re just too caked in gunk to bother washing again, grab some fresh ones. Swapping them out on your Shark steam mop? Dead simple, and it’ll have your floors gleaming in no time. Here’s the easy rundown:
- Start by unplugging your steam mop and letting it cool down.
- Remove the dirty mop head from the steam mop.
- Fill a tank with water, preferably distilled water, and add a cup of vinegar to create a vinegar solution.
- Place the new mop pad onto the steam head and secure it properly.
- Plug in your steam mop and allow it to heat up.
- Once heated, start cleaning your floors using hot steam and the vinegar solution.
Swap out those mop pads every few uses, and your Shark steam mop stays a floor-cleaning beast—no harsh chemical cleaners crashing the party. Keeps things fresh and effortless, you know?
Cleaning the mop head
Keeping your Shark steam mop head fresh is a game-changer for spotless floors—trusty tool deserves it, right? First off, yank the plug and let the whole thing cool down fully, unless you fancy a steamy hand adventure.
First things first, yank that mop pad off the head—it usually just unclips or pulls free without a fight. For everyday dirt, mix up equal parts water and white vinegar in a spray bottle (pro tip: vinegar’s your secret weapon against that sneaky buildup). Give it a good spritz, then scrub it down with a damp cloth. You’ll be amazed how the grime just melts away, no elbow grease required.
Got some stubborn gunk or stains clinging to your Shark steam mop head? Just pop it off the handle and give it a good soak in warm, soapy water for around 15 minutes—that’ll loosen most of it right up without much elbow grease.
All cleaned up? Snap that mop head back onto the handle, dial the steam down to its lowest setting, and you’re set to tackle those tile floors without turning them into a slip-n-slide.
Descaling and decalcifying
Next, descale that mop head before limescale from hard water turns it into a steam-choking mess. Skip this, and you’ll notice weaker bursts—I’ve ruined a couple forgetting it myself.
Grab a bowl and mix equal parts fabric softener and laundry detergent with some cold water—it’s like a spa treatment for your mop head. Soak a cotton pad in there, then gently scrub across the surface to blast away those stubborn mineral deposits and gunk. Steer clear of harsh chemicals, though; they’ll turn your trusty Shark into a pricey paperweight real quick.
Want to see it laid out super simple? Here’s the quick rundown in bullets:
- Mix fabric softener and laundry detergent in cold water
- Soak a cotton pad in the solution
- Gently rub the damp cotton pad on the mop head
- Continue until all stubborn stains and mineral deposits are removed
Stick to these steps, and your Shark steam mop head’ll stay spotless and raring to go—no more dodging grime on mopping day!
Can I Repair A Clogged Shark Steam Mop At Home?
Hey, if your Shark steam mop’s barely putting out steam or the flow feels all wimpy, it’s probably a clog gunking up the mop head. Don’t sweat it—you can knock that out at home super easily.
First things first, unplug your Shark steam mop and let it cool off completely—no one wants steam burns while cleaning. Yank off the mop head from the handle, then hit it with some warm water to blast away the loose grime. If it’s extra nasty, chuck it in the washer on gentle or give it a quick hand scrub with mild soap. Skip the fancy perfumes or rough chemicals, though—they’ll turn your pad into a sad, ruined mess faster than you can say “buy a new one.”
Got some stubborn clogs hanging on for dear life? Grab a paperclip, straighten it out, and gently poke it into those steam nozzles to bust up the junk. Go easy though—no Hulk-smashing here, or you could end up with a nasty shock if power’s still lurking. All clear now? Snap the mop head back on snug, plug her in, and get back to sparkling floors.
Hey, quick heads-up—if your Shark steam mop’s still under warranty, skip the DIY repairs or you’ll likely void it. Give Shark a shout first to play it safe.
Can The Shark Steam Mop Disassembly Process Be Dangerous?
Hey, before you start popping off that Shark steam mop head to clean it, heads up—disassembling these things can turn into a minor disaster if you’re not careful. I’ve sliced my finger on a mop pad clip before, so yeah, unplug it first, let it cool down completely, and handle those plastic bits gently to avoid any slips or snaps. Safety first, or you’ll be mopping up your own mess!
Alright, before you get started, unplug that Shark steam mop and flip the switch off completely—no sense risking a zap. Grab a pair of gloves too; those pads can sneak up and nick you if you’re not careful.
Grab that Shark steam mop, unplug it, and let it cool off first—safety wins every time. Pop off the mop head by lifting those easy-release tabs or just tugging the edges; no need for screwdrivers or wrestling matches. Trust your gut and go slow to dodge any scratches or stubbed fingers.
Pay attention to how all the bits snap together—you’ll thank yourself when it’s time to put it back without a fight. Stash those tiny pieces in a zip bag or drawer so they don’t play hide-and-seek or turn into a barefoot nightmare later.
Cleaning Nozzle and Head
Once you’ve popped apart your Shark steam mop, hit that nozzle and head with a solid clean—keeps the whole rig humming without any hiccups.
First off, brush away the loose crud with a soft cloth or brush; it’ll save you grief later. Whip up some warm water in a bucket or sink, toss in a squirt of gentle dish soap, and submerge the parts for 10 minutes. That soak works wonders on stubborn grime.
Give ’em a light scrub, rinse under a strong stream till the water runs clear, and air dry fully before snapping everything back. Boom, good as new—and yeah, I’ve skipped drying once; total regret city.
| Steps | Description |
|---|---|
| 1 | Remove excess dirt from nozzle and head |
| 2 | Soak in warm soapy water for 10 minutes |
| 3 | Gently scrub away dirt with soft brush |
| 4 | Rinse thoroughly with clean water |
| 5 | Air dry before reassembling |
Stick to these steps, and your Shark steam mop will stay in killer shape, blasting through messes like day one. No more weak steam or funky buildup—your floors will thank you!
Tips and Techniques
Want your Shark steam mop head looking brand new without the headache? I’ve got two dead-simple methods that actually work—trust your friendly neighborhood cleaning whiz on this. Here’s the scoop:
- Pre-treat tough stains: If you’re dealing with stubborn stains or sticky residue, it’s a good idea to pre-treat the area before using your steam mop. You can use a mild detergent or vinegar solution to loosen the grime, then follow up with the steam mop for a thorough clean.
- Use distilled water: To prevent mineral build-up and ensure efficient performance of your Shark steam mop, always use distilled water instead of tap water. This will help prolong the life of your mop and maintain its effectiveness over time.
- Clean the mop head regularly: After each use, take a few minutes to clean the mop head thoroughly. Rinse it under warm water and remove any debris or fibers that may have accumulated during cleaning. This will help prevent clogs and maintain optimal steam production.
Stick to these two easy methods, and your Shark steam mop head stays fresh, pumping out spotless floors every single time. No more buildup sneaking up on you—your home stays gleaming, hassle-free.
Conclusion
And that’s a wrap—keeping your Shark steam mop head squeaky clean is a total breeze, and man, that fresh feeling? Totally worth the couple minutes.
Follow those steps I mentioned, and you’ll pop the mop head right off, give it a solid scrub, and have it looking brand new—no fuss, no drama. Your floors are gonna love you for it.
Watch out for that scalding hot water—it’s no joke if you get splashed. Safety first, every single time.
Stick with it for a couple tries, and you’ll be nailing that Shark steam mop head clean-up like it’s no big deal—your floors will sparkle, I promise.
So go ahead, give it a whirl and watch those dirt demons disappear!
Frequently Asked Questions
Can I put my Shark steam mop head in the washing machine?
Yes, most Shark steam mop pads are machine-washable. Use a gentle cycle with cold or warm water and a mild detergent. Avoid bleach, fabric softeners, or dryer sheets, as they can damage the fibers and reduce absorbency. Tumble dry on low heat or air dry to extend pad life.
How do I remove stubborn hair and debris from the mop head?
Before washing, pull off loose hair and debris by hand or use a pet brush to comb through the fibers. For stuck-on particles, rinse under running water while gently rubbing the pad against itself. This prevents clogs and ensures even cleaning during the wash cycle.
What if my Shark mop head smells bad after cleaning?
Odors often come from trapped moisture or bacteria. Soak the pad in a solution of equal parts white vinegar and water for 30 minutes before washing, or add 1/2 cup baking soda to the wash cycle. Always dry completely—air drying in sunlight helps kill bacteria naturally.
Is it safe to use bleach or harsh chemicals on the mop head?
No, avoid bleach or strong chemicals, as they break down the microfiber material, causing it to fray or lose steam-trapping ability. Stick to mild dish soap or laundry detergent. For disinfection, vinegar works effectively without damage.
How often should I clean the Shark steam mop head?
Clean after every 3-5 uses or when visibly dirty to prevent buildup. Deep clean (wash) weekly if used frequently. Rinse lightly after each use to remove residue, and inspect for wear—replace if frayed or no longer absorbing water well.
How do I clean burnt-on residue from the mop head?
Soak in hot water with a tablespoon of baking soda and mild detergent for 1 hour. Gently scrub with a soft brush, then machine wash. For severe cases, repeat the soak or spot-treat with a paste of baking soda and vinegar before rinsing thoroughly.
When should I replace my Shark steam mop head?
Replace after 3-6 months of regular use, or sooner if it frays, doesn’t hold water/steam, leaves streaks, or harbors persistent odors despite cleaning. Shark pads are affordable replacements—check for even wear across the entire pad before deciding.