How To Clean Tongue And Groove Wood Flooring
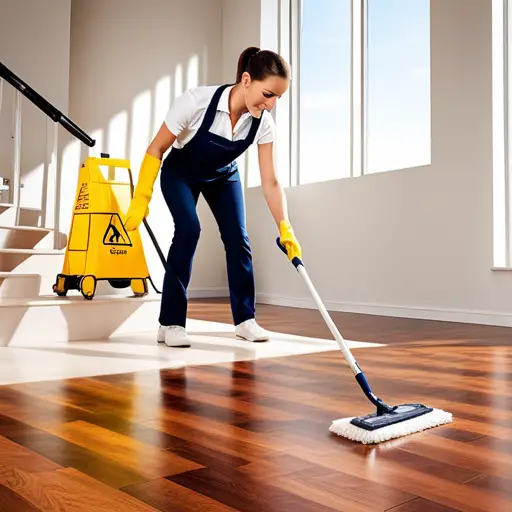
To clean tongue and groove wood flooring effectively, start by dusting or vacuuming to remove loose dirt, then use a wet/dry vacuum to clean along the grooves. For a thorough clean, use a microfiber cloth with a gentle cleaning solution, avoid abrasive cleaners, and never wet-mop the floor. Cleaning the grooves may take time, but regular maintenance will keep your floors in good condition and prevent damage.
Cleaning tongue and groove wood flooring is an essential task to maintain its beauty and durability.
As a homeowner who takes pride in my stylish floors, I understand the importance of regular maintenance.
Over time, dirt and grime can accumulate in the grooves, making it necessary to clean them thoroughly.
But fear not!
I have learned effective methods that will leave your wood floors looking sparkling clean.
In this article, I will share my knowledge and experience on how to clean tongue and groove wood flooring.
From preventing dirt and debris to choosing the right cleaning method for your specific floor finish, I will guide you through each step with detail and expertise.
Trust me, by following these simple techniques, you can restore the luster of your wood floors and ensure their longevity.
So let’s dive in and discover how easy it is to keep your tongue and groove wood flooring looking its best!
Key Takeaways
- Vacuum along every groove line with a wet/dry vacuum to remove debris.
- Mix a cleaning solution with water and dishwashing detergent or a cleaner specific to hardwood flooring to clean the grooves.
- Use a slim tool like a plastic putty knife or toothbrush for stubborn grime in the grooves.
- Follow up with another thorough vacuuming and use a dry mop method to get the wood floors sparkling clean.

How to Maintain tongue and groove wood flooring
Now let’s talk about how you can easily maintain your beautiful tongue and groove wood flooring!
Regular upkeep makes all the difference—your tongue-and-groove wood floors stay gorgeous and scratch-free when you don’t slack off. Skip it, and those sneaky dust bunnies will have you scrubbing twice as hard later.
Alright, kick things off by vacuuming those floors weekly with a beast of a vacuum. It’ll suck up all the dirt and crud lurking in the grooves before it grinds into your wood like an unwelcome guest.
Want to really dig into those sneaky grooves? Grab a microfiber cloth, dampen it with a mild cleaner—no harsh stuff, or you’ll regret it—and swipe right along the tongue and groove edges. Your floors will pop like new, I promise you won’t believe the difference.
Doing this regularly keeps your tongue-and-groove hardwood floors sparkling clean and ready for bare feet—no more sneaky dirt buildup or that dull look after a few years.
Alright, once you’ve got your floors sparkling, let’s keep that gunk from sneaking back in—nobody wants to be on their hands and knees every weekend, right?
Preventing Dirt and Debris
Those gorgeous tongue-and-groove hardwood floors deserve better than a dust bunny convention in the cracks, you know? Head off the grime buildup in those sneaky grooves right from the start, and they’ll stay stunning way longer.
Grab a microfiber dust mop and give your tongue-and-groove floors a quick once-over every week. Those sneaky grooves love trapping dust bunnies, but this bad boy sucks ’em right up without scratching the wood or spreading grit everywhere. You’ll save yourself a world of scrubbing headaches later.
It whisks away dust bunnies, pet fur, and all those sneaky bits lurking in the grooves—no scratches on your wood, I swear I’ve tested it on mine.
Pop some sturdy mats right at your doorways—they’ll snag all that outdoor grit before it treks across your tongue-and-groove wood floors. I’ve skipped way too many deep cleans just by doing this simple trick.
Spills happen to the best of us—dab ’em up fast with a paper towel before they soak in. Whip up a quick white vinegar and water mix on your mop head, and it’ll keep those tongue-and-groove wood floors sparkling without any drama.
Alright, with the basics covered, let’s pick the perfect cleaning approach for those tricky tongue-and-groove beauties—trust me, get this right and your floors will thank you.
Tongue and groove wood floors have those sneaky little grooves that love trapping dirt and grime—stay on top of regular cleaning, or you’ll end up with a gritty nightmare underfoot.
Want that deep clean on your tongue-and-groove wood floors without wrecking the grooves? Grab a cleaner made just for hardwood—it’ll cut through grime like a champ and leave no sticky mess behind. Skip the cheap all-purpose sprays; they’ve ruined more floors than I care to count.
Grab a soft, clean rag and swipe that cleaner right along the grooves between your boards. Those tough grime spots? Give ’em a gentle nudge with some light scrubbing—easy now, we don’t want to rough up that gorgeous wood.
If messing with your tongue-and-groove wood floors feels like too much hassle, just call in the pros who specialize in hardwood. They’ll get every groove spotless without you lifting a finger—way easier than scrubbing solo, right?
Get the cleaning right on those tongue-and-groove wood floors, and they’ll stay gorgeous and tough as nails for years—no more faded spots or squeaky regrets!
Understanding the Floor Finish
Picture your tongue-and-groove hardwood floors gleaming like they just rolled off the mill—smooth as silk, with a fresh coat that really pops the wood’s natural grain and those rich tones you love. Gets me every time how a good clean turns ’em from meh to magnificent, you know?
First things first, check what finish your tongue-and-groove wood floor has—oiled, waxed, or that tough polyurethane coat? Get it wrong, and you’ll either strip the beauty right off or leave a gummy mess. Nail this, and cleaning’s a breeze.
Depending on your wood floor’s finish, you’ll want to tweak your cleaning method—otherwise, you risk water sneaking in and warping things or stripping off that protective sealant. Oiled floors? Skip the soapy floods. Polyurethaned beauties? A damp mop’s your friend, but don’t drown ’em.
Figure out your tongue-and-groove floor’s finish first—is it sealed, oiled, or unfinished? That little detail points you straight to the right tools and cleaners, saving you from a sloppy, streaky disaster.
Preparing the Floor for Cleaning
Alright, before we roll up our sleeves and tackle cleaning those tongue-and-groove beauties, let’s make sure your floors are all prepped and ready—no point scrubbing if they’re not set up right, you know?
First off, clear the room—haul that sofa, side tables, and any clutter out of the way. Trust me, you don’t want to be dodging lamp cords while scrubbing those grooves.
Grab a soft microfiber cloth, dampen it just a tad with warm water, and give your tongue-and-groove floor a quick wipe to knock off all that loose dust and grime. Wood’s picky about moisture, so don’t go overboard—think gentle spa day, not a car wash.
Got some stubborn stains on your tongue-and-groove wood floors? Steer clear of steam cleaners—they’ll warp those boards quicker than a bad DIY nightmare. Wax-based cleaners? Nah, they’ll just clog up the grooves and make things worse. And abrasive stuff like steel wool? Total no-go; you’ll scratch the finish and regret it big time.
Grab some protective gloves before you start prepping that tongue-and-groove floor—wood dust and cleaners can turn your hands into a wrinkled mess real quick, and nobody’s got time for that.
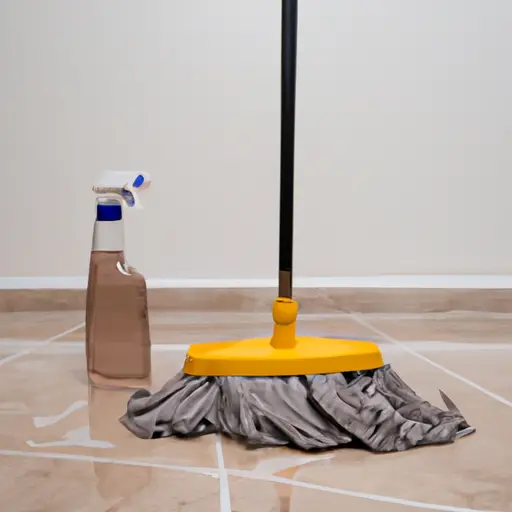
Alright, time to talk cleaners—the right one makes all the difference on tongue-and-groove wood floors. Slap on the wrong stuff, and you could end up with warped boards or a sticky mess that haunts you for weeks. Stick with me here; I’ll walk you through the good options.
Using the Proper Cleaning Solution
With your tongue-and-groove wood floors all prepped and ready, grab the right cleaning solution—pick wrong, and those tight joints turn into a gritty nightmare.
Those grooves love to hoard dirt, don’t they? For every 500 square feet of tongue-and-groove wood flooring, toss 1/4 cup of Bona Hardwood Floor Cleaner Spray into a bucket with warm water, give it a quick stir, and mop like a pro—your floors will shine without turning into a puddle party.
You know how pet pee (pun intended) or muddy paw prints can wreck your tongue-and-groove wood floors? This streak-free cleaner blasts away urine stains, loose grit, and fresh spills like a champ—leaves everything spotless, no sticky gunk behind. Your floors will thank you.
Grab a microfiber mop or soft cloth, dunk it in that cleaning solution you whipped up, and give the whole floor a gentle wipe-down. Those sneaky grooves love trapping dirt, so work it in nice and easy—you’ll have it sparkling without a scratch.
Alright, now for the fun part—those sneaky grooves between the planks where all the gunk hides out. Grab a soft brush or an old toothbrush to really get in there without scratching your wood.
Cleaning the Grooves
Start by grabbing a thin tool like a toothbrush or plastic putty knife, and get ready to tackle the grooves between your beautiful hardwood planks.
Those grooves can trap grime like nobody’s business, so hit ’em with a hardwood floor spray like Bona Hard Surface Cleaner or Rejuvenate—they cut through the mess without wrecking your finish. I’ve saved plenty of floors this way.
Grab a spray bottle, mix in your wood-safe cleaner with warm water—about a capful to a full bottle works wonders—and spritz it right into those stubborn grooves where dirt loves to camp out. Shake it first, or you’ll end up with streaks, and watch the gunk loosen up like magic.
Grab a microfiber mop and give those grooves a gentle scrub—dig right into every nook and cranny where the grime hides like it owns the place. Rinse it all with plain water next, then dry thoroughly so your wood doesn’t warp on you.
Alright, time to tackle that nasty, stuck-on grime clinging to your tongue-and-groove floors—without wrecking the wood, obviously.
Removing Stubborn Grime
Ugh, those sneaky stains and grime buildup on your tongue-and-groove wood floors? They’re no match for us—let’s roll up our sleeves and get ’em sparkling like new again!
Steer clear of wax-based cleaners or those solvent-heavy hardwood floor waxes—they’ll smear on residue that gums up your tongue-and-groove boards and turns a quick wipe-down into a real mess. Seen it happen too many times; your floors will thank you.
Yeah, skip the sketchy stuff that could wreck your tongue-and-groove beauties—instead, grab Bona PowerPlus Hardwood Floor Deep Cleaner. That bad boy cuts through grime like a champ without stripping the finish, leaving everything fresh and ready for bare feet.
First off, grab a lightweight vacuum and give those grooves a thorough once-over to suck up all the loose dirt and crumbs lurking in there. Trust me, skipping this step just means you’ll be chasing grit around later—total pain.
Next, squirt on that cleaner just like the bottle says—those instructions aren’t there for decoration. Grab a soft-bristled brush or mop and give it a gentle scrub, nice and easy so you don’t scratch up your gorgeous wood floors.
If you’ve got deep gouges or stains that laugh at your scrub brush, skip the steam cleaner—wood floors hate moisture and it’ll warp ’em faster than you can say “oops.” Lightly sand with fine-grit paper if you’re feeling brave, or just bite the bullet and call a pro to save your sanity.
After you’ve scraped off all that grime, grab a dry cloth and give the floor a quick wipe-down—no lingering moisture to warp those grooves, right? Then you’re good to dry it out completely and add any final polish.
Alright, you’ve tackled that stubborn grime on your tongue-and-groove wood flooring—nice work! Now let’s get it dried off properly and add those final touches for a floor that’ll shine like new.
Drying and Finishing the Floor
Once you’ve scrubbed away that stubborn grime from your tongue-and-groove hardwood, pat everything bone-dry—seriously, no damp spots lurking, or you’ll regret it later. Slap on a good finish next to lock in that warm glow and keep your floors looking sharp for years, you know?
Grab a clean, dry mop or towel and wipe up that leftover moisture right away. Your tongue-and-groove flooring will thank you—no one wants warped planks turning their pretty porch into a wavy mess!
Next, grab a solid hardwood floor cleaner or polish and follow the label’s directions to the letter—trust those instructions, or you’ll end up with a shiny mess instead of sparkling floors.
Doing this’ll bring back that gorgeous shine to your tongue-and-groove floors, while knocking back those annoying scratches and scuffs—nobody wants their pretty wood looking beat-up, right?
Let the floor air dry all the way—no rushing this part, or you’ll end up with warped boards and a big mess. Once it’s bone dry, fire away with sanding or refinishing.
Look, if your tongue-and-groove hardwood’s got those ugly deep scratches or spots worn down to nothing, regular cleaning just won’t cut it—call in a pro who lives and breathes floor restoration. You’ll thank yourself later.
| Tip 1: Use a clean dry mop or towel | Tip 2: Apply a high-quality hardwood floor cleaner or polish |
|---|---|
| Using a dry mop or towel will help absorb any excess moisture on the surface of the wood and prevent water damage. | A good quality cleaner or polish specifically designed for hardwood floors will enhance their appearance and provide added protection against wear and tear. Follow the instructions on the product label for best results. |
Hiring Professional Cleaners
By now, you’ve got the hang of sweeping out the grit, vacuuming those sneaky grooves, and mopping gently so your wood doesn’t warp like a bad spaghetti western. But hey, if scrubbing on your knees sounds about as fun as a root canal, just call in the pros—they’ll make it sparkle without the sweat.
Look, if scrubbing those tight grooves sounds like a nightmare—and trust me, it is—call in the pros. They’ll blast through the grime way faster than you could, leaving your wood floors gleaming without turning your weekend into a sweat fest.
Pros get their hands on these commercial hardwood floor cleaners made just for wood like yours—they’re built to fend off scratches without a fuss. You can snag similar stuff at any home store, though; no need to call in the cavalry for your tongue-and-groove beauty.
If your tongue-and-groove floors have stubborn scuffs, just grab some fine-grit sandpaper for a quick, gentle pass—nothing aggressive, promise. Then mix equal parts white vinegar and warm water, mop it on lightly, and let it work its magic. Boom, clean as the day you installed ’em, no harsh chemicals needed.
Frequently Asked Questions
Can I use bleach to clean the grooves of tongue and groove wood flooring?
Steer clear of bleach for those grooves in your tongue-and-groove flooring—it’s a total disaster waiting to happen. That stuff strips the finish faster than you can say “oops” and leaves ugly streaks all over your pretty wood. Stick to gentler options, yeah?
Just grab a mild soap mix or one of those wood-safe cleaners from the store—trust your floors to handle that without any drama. Harsh stuff? Nah, it’ll sneak into those grooves and cause all sorts of headaches.
How often should I deep clean the grooves of my wood flooring?
Getting those grooves in your tongue-and-groove wood floors sparkling clean is a total slog—it’ll eat up your whole afternoon. I only tackle it once a year, unless the place looks like a mud-wrestling arena.
Getting the gunk out of those tight grooves demands real patience and some serious scrubbing—trust me, it’s no quick wipe-down. Short on time or just over it? Call in the pros; they’ll blast through it faster and leave your floors sparkling without the drama.
Is it necessary to sand the grooves of tongue and groove wood flooring?
Nah, don’t waste your time sanding those grooves in your tongue-and-groove flooring. It’s overkill for cleaning—just scrub ’em gently and call it a day.
Just grab your vacuum and suck up all the dirt from those tricky grooves first—don’t skip it, or you’ll be fighting crumbs forever. Whip up a mild soap solution, nothing fancy, and gently wipe everything down with a soft sponge. Boom, your tongue-and-groove floors stay fresh without any drama or damage.
Can I use steam mop to clean the grooves of wood flooring?
Sure, a steam mop’s a solid pick for blasting grime out of those pesky grooves in tongue-and-groove flooring. Just ease up on the steam, though—too much heat or moisture, and your wood’s gonna swell up like a sponge. Learned that one after a rookie mistake!
Always spot-test your cleaner on a hidden corner first—trust those gorgeous grooves not to turn blotchy on you. I’ve ruined a floor or two learning that lesson the hard way.
What is the best way to prevent dirt and debris from accumulating in the grooves of wood flooring?
Keep those grooves in your tongue-and-groove floors from becoming total dirt magnets by sweeping regularly with a microfiber dust mop—it picks up the gunk without pushing it deeper. And yeah, shove the clutter aside first; nothing kills a cleaning vibe like dodging kid toys or dog toys mid-mop.
Pop in quick sweeps a few times a week, and those grooves won’t turn into nasty dust traps—trust me, it’ll save you a headache down the line.
Conclusion
Man, after scrubbing down my tongue and groove wood floors for a solid few hours, I stepped back and just stared—holy cow, they looked brand new, like I’d peeled back years of grime in one go. Totally worth every bit of sweat.
Those grooves crammed with dirt and gunk? Now they’re gleaming like they just got a spa day. Yeah, it took some serious scrubbing, but stepping back to admire that fresh shine—totally worth every bit of sweat.
Step back and take a good look at those shiny tongue-and-groove beauties—you’ve just brought ’em back to life! Kinda makes you wanna dig into what else these old floors have been hiding under all that dirt, right?
Every year, I dive deeper into the quirks of tongue-and-groove wood floors, tweaking my cleaning routine to keep ’em shining like the day they were laid. You stick with these steps, and yours’ll stay gorgeous for your kids—and theirs too, no sweat.