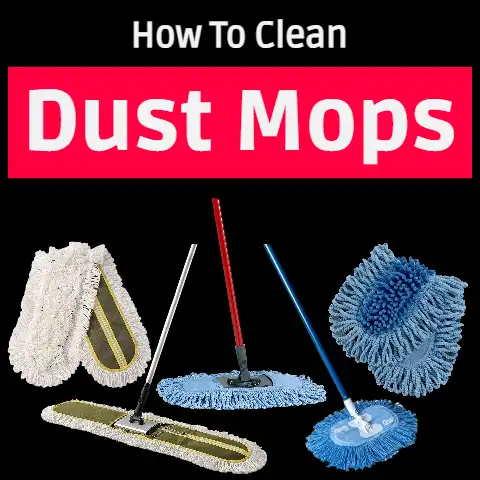
Maintaining Your Mop To Improve Floor Cleaning (Explained)
Quick Summary
| Problem | Solution |
|---|---|
| Mop leaves streaks or residue | Rinse mop head thoroughly after each use and launder weekly in hot water |
| Reduced absorbency or matted fibers | Soak in vinegar solution, gently scrub, and hang to dry upright |
| Fibers shedding or fraying | Inspect regularly; replace mop head every 3-6 months or 100 uses |
| Odors or bacterial buildup | Disinfect with bleach solution (1:10 ratio) monthly or use antimicrobial mop covers |
| Handle instability or poor wringing | Tighten fittings; upgrade to 2026 smart-mop with auto-wring tech |
Keeping your mops in good working condition is essential for effective floor cleaning. Neglected mops spread dirt and bacteria, leave streaks, and simply don’t clean as well. By taking the time to properly wash, dry, store, and replace your mops, you can improve cleaning performance, extend mop lifespan, and create a healthier home.
- Washing Mops
- Drying Mops
- Storing Mops
- Replacing Mops
You’ll also discover solutions for common mop problems, preventative tips to avoid issues, alternative mopping tools, and answers to frequently asked questions.
Whether you’re a cleaning novice or expert, this guide aims to help all readers become mop maintenance masters! Let’s start by breaking down the basics.
Washing Mops: A Vital First Step
Regularly washing your mops is crucial for removing built-up dirt, stains, bacteria, and grime. Dirty mops will leave floors dirtier than before you mopped. Here are the best practices for keeping your mops squeaky clean.
Supplies You’ll Need
- Bucket or sink for washing
- Hot water
- Mild detergent or all-purpose cleaner
- Old toothbrush or scrub brush
- Vinegar or bleach (optional)
Wash New Mops Before First Use
Brand new mops often arrive with a light protective coating or residue from packaging and shipping. Give new mops a thorough wash before their first use to avoid transferring anything unsavory to your floors.
Wash After Every Use
Ideally, you should wash your mop after each use. This prevents dirt, debris, and moisture from accumulating in the mop head over time. Frequent washing limits bacterial growth and foul odors.
Use Hot Water and Mild Detergent
Fill your bucket or sink with hot water and a small amount of mild detergent or all-purpose cleaner. Avoid harsh chemicals that could degrade the mop fibers. Swish the mop head around to loosen debris.
Scrub With a Brush
For stuck-on stains or ground-in dirt, use an old toothbrush, grout brush, or other scrub brush to gently agitate the mop head fibers while soaking. This lifts grime from deep within the mop.
Rinse Thoroughly
Once washing with detergent is complete, rinse the mop head thoroughly with clean water to remove all suds and residue. Remaining soap can leave floors streaky.
Sanitize Regularly
Once every week or two, sanitize your washed mop by soaking it for 5-10 minutes in a vinegar solution or bleach-water mix. This helps kill germs and bacteria that plain soap and water may have missed.Consistently washing your mops keeps them working like new, but drying them properly is equally important…
Drying Mops: Prevent Mildew and Rot
Washing your mops isn’t enough on its own. Failing to thoroughly dry mops between uses can create major problems, including:
- Mildew and mold growth
- Rotting and degradation of mop fibers
- Bad odors
- Bacteria spreading back to cleaned floors
Follow these guidelines to dry your mops properly after each wash.
Materials Needed
- Clean sink, bucket, or bathtub
- Fan or sunlight access
- Old towels (optional)
Drain Excess Water
After washing your mop, thoroughly drain any excess water from the mop head before starting the drying process. Be forceful with wringing – a sopping wet mop will never fully dry.
Air Dry Thoroughly
Simply hanging washed mops to drip dry is insufficient – trapped moisture keeps the inner fibers damp. For best results, thoroughly air dry each mop.You can:
- Hang mops outside in direct sunlight
- Place mops in front of a fan indoors
- Lay mops flat on clean towels to wick moisture
Rotate and fluff mop fibers while drying to expose all sides to air.
Allow 12-24 Hours Minimum
Depending on humidity levels, mops should dry for at least 12-24 hours before their next use. Thicker mop heads require longer. This prevents any hidden inner dampness.
Check Thoroughly Before Re-Using
Before putting an apparently dry mop back into rotation, inspect it closely and press down firmly on the fibers. If any moisture appears or you detect a musty odor, it requires more drying time. Mildew starts growing quickly on damp mops!With clean and fully dry mops in hand, proper storage is next…
Storing Mops: Keep Them Accessible and Organized
The way you store mops between uses impacts their drying time and lifespan significantly. Organize your storage to protect mops and improve cleaning convenience.
Designate a Dry Storage Area
Mops stored in dark, humid spaces are breeding grounds for mold and bacteria. Designate an area for mop storage that meets these criteria:
- Well-ventilated
- Dry
- Room temperature
- Accessible
- Free from direct sunlight (to avoid bleaching)
A coat closet, laundry room, or garage corner tends to work well.
Hang Mops Vertically
Store mops with the head facing down. Hanging vertically allows gravity to prevent water from pooling at the base of mop fibers. Storing horizontally leaves them prone to remaining damp.
Keep the Mop Head Off the Ground
If the mop head rests on the floor or touches surrounding walls, it can transfer dirt and moisture back onto the fibers. Use hooks or tall containers to keep mops elevated.
Consider a Ventilated Container
For better airflow, store mops in a bucket or bin with ventilation holes. Just ensure no mop fibers poke outside, or they may snag and unravel.
Don’t Lean on Walls
Mops leaned against walls risk mildew growth and fiber damage where they crumple against the surface. Hang or stand them fully upright instead.
Designate Individual Hooks
If multiple mops share a hook or bin, their fibers tangle together. Give each mop its own dedicated storage hook and space for less hassle untangling before uses.With the right storage, a quality mop should last 1-2 years with proper care. But knowing when to replace them is key…
Replacing Mops: Signs It’s Time
As mops age and accumulate wear and tear, their cleaning performance drops, even with good maintenance. Here are signs it’s time to replace your old, worn-out mop:
Fraying Fibers
Mop heads become visibly frayed, with stray fiber strands poking out across the surface. These snag on imperfections while mopping and rip more strands loose.
Flattening Shape
A mop head that appears smashed flat struggles to scrub into the crevices of uneven floors. The less “fluffy” the mop, the worse it cleans.
Musty, Soiled Smell
If washing and drying fails to remove foul odors from the mop fibers, bacteria and mildew have taken up permanent residence.
Staining & Discoloration
Beyond surface dirt that washes away, permanent stains, bleaching, and discoloration also indicate a mop has reached the end of its lifespan.
Mold Growth
Significant mold or mildew growing on a mop means it’s too hazardous to keep using. Toss it!
Difficulty Getting Dry
A mop that stays soggy and moist hours after washing dries too slowly to prevent mildew between uses. Time for a fresh one!I recommend replacing your mops every 1-2 years as a rule of thumb, perhaps more frequently for heavy-duty use.
Troubleshooting Common Mop Problems
When mop maintenance goes awry, frustrating issues can arise. Here are solutions to the most common mop problems readers face:
Problem: Streaky/Cloudy Floors
Solution: Rinse mops more thoroughly after washing. Residual soap and chemicals leave unsightly residue and streaks on floors.
Problem: Musty Smells
Solution: Dry mops quicker and more thoroughly between uses. Musty odors indicate mildew growth within the fibers. Follow drying guidelines closely.
Problem: Spreading Dirt Back to Floors
Solution: Wash mops after each use and sanitize them regularly. Dirty mops merely spread grime across more floor space.
Problem: Leaving Lint and Fuzz Behind
Solution: Avoid drying mops on towels, which causes lint clinging to fibers. Air dry instead. Also replace overly frayed mops.
Problem: Floors Not Getting Clean
Solution: Replace mops that flatten out from old age and use. Their scrubbing power weakens over time.Catching and correcting any mop problems quickly restores their cleaning capabilities – but prevention is ideal…
Preventing Mop Problems Before They Start
Staying vigilant with mop maintenance keeps issues at bay. Here are some key prevention tips:
- Rinse mop heads very thoroughly after washing – Residual detergent is a common culprit behind poor mop performance.
- Wring out all excess water before drying – Sopping wet mops encourages mold and bacteria. Be forceful when wringing!
- Dry mops for 24 hours or more between uses – Err on the side of over-drying rather than risking dampness and odors.
- Replace mops at the first sign of deterioration – Threadbare, smelly mops don’t clean well and require too much upkeep.
- Use two mops in rotation – Having a backup mop means you always have a fully clean and dry one on hand for floors.
- Consider machine washing – For deep cleaning, machine washing spin cycles can wring more effectively.
- Choose quality mops – Cheap mops fray faster and clean poorly compared to professional grade options.
An ounce of prevention through attentive care and maintenance helps your mops deliver spotless floors for years of faithful service!
Alternative Mopping Tools
While traditional string mops are most common for floor cleaning, alternative mop styles exist that each offer unique benefits:
Microfiber Mops
Extremely fine microfiber strands attract dust and dirt electrostatically. No chemicals needed! Dries quickly. Reusable with machine washing.Best for: Tile, vinyl, laminate. Good for delicate floors.
Steam Mops
Hot steam alone sanitizes floors without soap. Disposable pads attach. Convenient and chemical-free!Best for: Disinfecting sealed floors. Fast maintenance cleaning.
Spin Mops
Centrifugal spinning wrings water out efficiently. No need to kneel down and manually wring! Pivoting heads adjust to floor shape.Best for: Cleaning large floor areas quicker. People with mobility challenges.
Robot Mops
Automated units clean floors through pre-programmed routes. Scrub and vacuum functions. Hands-free convenience.Best for: Light, routine maintenance cleaning. People with physical limitations.Varying your mopping tools expands your capabilities for specialized cleaning needs!
Frequently Asked Questions
Here are answers to some common reader questions about mop maintenance:
How often should you replace mop heads?
Ideally, replace mop heads every 1-2 years for best cleaning results, or more often with heavy-duty use. Signs like fraying, flattening shape, and permanent stains also indicate replacement time.
Can all mop types go in the washing machine?
No! Read your mop product details first. Machine washing risks damaging certain mop head materials, especially with heat or spin cycles. Play it safe hand washing instead.
Is it OK to dry mops in the dryer?
No! Tumble drying risks shrinking or misshaping most mop heads. Trapped lint and fuzz also cling to mop fibers. Always air dry mops instead.
How do you get rid of bacteria in old mops?
To kill bacteria lurking deep in soiled, smelly mops, soak them for 5-10 minutes in a sanitizing solution of either household vinegar or a bleach/water mixture after washing.
Can I use the same bucket for washing and rinsing mops?
It’s best practice to use separate buckets for washing and rinsing, to prevent redepositing dirt and chemicals back onto mops. But in a pinch, thoroughly clean and rinse a single bucket between steps.