How To Hang Brooms in the Garage (3 Methods)
There are several ways to hang brooms in the garage, including using a broom holder or simple hooks, installing a wall track, and employing an alternate arrangement to maximize space. Consider your garage space and the number of brooms you have to find the best storage solution.
If you’re an avid Harry Potter fan then I’m sure you’ve heard of the concept of hanging a broom in the garage.
The idea is that if you have a broom set out, then that is where you will find a witch or wizard.
It’s a simple concept but one that I’ve seen used in books and movies.
This blog is going to take a look at that and how you can apply that in your garage and your home.
A broom is one of the most important tools in the garage. It is also one of the most versatile tools.
From cleaning the garage floor to clearing out snow, brooms are one of the most important tools that every garage needs.
Key Takeaways
- Evaluate available wall space and measure the height and width for broom storage
- Use vertical storage solutions and broom holders to maximize space efficiency
- Consider the different types of broom holders available and choose the right one for broom size, weight, and number of slots
- Properly prepare the garage wall, fill any holes or imperfections, and securely install the broom holder while considering safety considerations

Assessing the Garage Space
When assessing the garage space for hanging brooms, it is essential to evaluate the available wall space.
This evaluation helps determine how many brooms can be stored and how they can be arranged efficiently.
Additionally, it is important to consider the optimal location for easy access and convenience.
Placing the brooms in a spot that is easily reachable will ensure that they are readily available whenever needed.
Evaluate available wall space for broom storage
To assess the feasibility of hanging brooms in the garage, it is crucial to evaluate the wall space that is available for storage.
The amount of wall space will determine the number of broom holders or storage solutions that can be installed.
When evaluating the wall space, consider the following:
- Measure the height and width of the available area to ensure it can accommodate broom holders or organizers.
- Take into account any obstructions such as shelves or cabinets that may limit usable wall space.
- Consider using vertical storage solutions such as mop organizers or multi-purpose racks to maximize space efficiency.
- Evaluate if there are adjacent areas where other cleaning tools like gardening tools or mops can also be stored.
Once you have assessed the available wall space, you can proceed with selecting suitable broom holders and securing them with wood screws for a secure and organized storage solution.
Determine the optimal location for easy access and convenience
The optimal location for easy access and convenience can be determined by evaluating factors such as proximity to frequently used areas and the overall flow of traffic within the designated storage space.
When considering where to hang brooms in the garage, it is important to explore different storage options that provide a practical location for quick retrieval.
One option is using a broom holder, which can be easily mounted on a garage wall.
This allows the brooms to be stored upright, saving valuable floor space.

Another consideration is locating the broom storage near frequently accessed areas, such as entrances or utility closets.
By doing so, users can conveniently grab their brooms without having to travel far.
Overall, finding an optimal location for hanging brooms in the garage involves strategic placement that promotes ease of use and efficient organization.
Why You Should Hang Your Mops
Some tend to set their mops on the floor in the corner of their closet.
Others take them to their garage to leave there because the mops are considered “dirty”.
However, these are the worst ways to store your mop. The best way to store your mop is by hanging it.

Hanging your mop keeps the mop head off the floor. This will keep your mop head cleaner and extend its life.
If your mop is slightly damp hanging it allows the mop head to have more airflow; ensuring your mop doesn’t get smelly.
Hanging it also ensures it will be dry the next you’re ready to use it.
Hanging your mop is a great way to save space.
Mops are relatively small but when they are sitting on a floor, they take double the square feet to store.
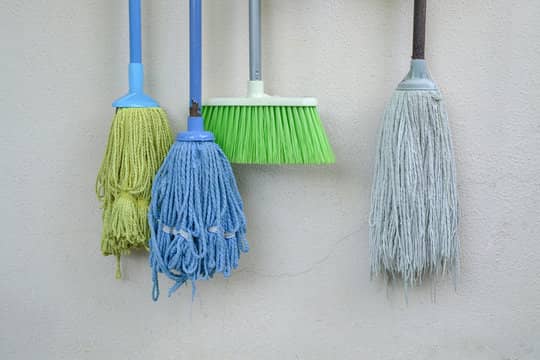
All mops, brooms, and even dustpans have a hole at the top for a hook. Because that is its intended method of storage!
How to Hang Your Mop
When looking to hang your mop. Make sure the mop head is facing down.
This allows you to grab your mop more conveniently and allows for better airflow.
You want to hang it high enough that no part of the mop head touches the ground.
If you have a string/rope mop before hanging the mop, you will want to brush out the strands to keep them from knotting up.
You want to make sure no part of the strands touches the floor. That will help maintain the integrity of the fibers.
In addition to extending the mop’s life. If you have an expensive mop, you must try to take all precautions to make it durable.
If you have a flat mop face the bottom part of the pad outwards and not against the wall.
If the flat mop is slightly damp, having it rest against the wall will affect the airflow and potentially cause bacteria growth.
Strip mops should also be stored with the bottom pad facing outwards.
Usually, with these mops, you change out the pad after every use. So, moisture isn’t as large of an issue.
If you own a steam mop, you may be in the clear on hanging it. Check your owner’s manual for that companies preferred storage technique.
When spacing your mops to hang try to keep the mop heads from touching. By not letting them touch will allow better airflow.
Airflow is critical when you are hanging and storing your mop.
If you own a dust mop you will want to keep it spaced further away from the wet mops.
Some dust mops do not work as well if they have been exposed to moisture.
Preparing the Garage Wall
When preparing the garage wall for hanging broom holders, it is important to start by cleaning the wall surface to remove any dirt and dust.
This will ensure that the broom holder adheres properly to the wall.
Additionally, if there are any holes or imperfections in the wall, they should be filled before installing the broom holder to ensure a smooth and secure attachment.
Clean the wall surface to remove dirt and dust
To ensure a secure and stable installation, it is important to thoroughly clean the wall surface in the garage to remove any dirt and dust particles.
Before hanging brooms in the garage, it is crucial to prepare the wall by cleaning it properly.
Dirt and dust can accumulate on the wall surface over time, which can affect the adhesion of hooks or wall mounts used for hanging brooms.
Cleaning the wall will create a smooth and clean surface for proper attachment.
Start by removing any loose dirt or debris using a broom or vacuum cleaner.
Then, wipe down the wall with a damp cloth or sponge to remove any remaining dust particles.
Pay close attention to corners and crevices where dirt tends to accumulate.
By ensuring a clean wall surface, you can maximize the effectiveness and longevity of your broom closet or storage space in the garage.
If needed, fill any holes or imperfections in the wall
If necessary, any holes or imperfections in the wall surface should be filled to ensure a smooth and even attachment for hooks or wall mounts.
This step is crucial in preparing the garage wall for hanging brooms.
By filling these holes or imperfections, the wall becomes more stable and secure, allowing for a reliable storage solution.
Melinda Black Getty suggests that families with children can benefit from this simple space-saving trick as it helps to keep brooms organized and out of reach from little hands.
Additionally, mini cleaning supplies can also be stored alongside the brooms using hooks over grippers or a holder wall mount.
In limited space situations, such as small garages or common storage spaces, unrealistic expectations of neatly placing brooms against walls may lead to clutter and inefficiency.
Therefore, filling any holes or imperfections in the walls is a practical approach to maximize storage spaces.
Choosing the Right Broom Holder
When choosing the right broom holder for your garage, it is important to consider the various types available.
Wall-mounted holders are a popular choice as they can be easily installed and provide secure storage for brooms.
Magnetic holders are another option, offering a convenient way to hang brooms without the need for mounting hardware.
Adhesive holders are ideal for those who prefer not to drill holes in their walls.
Additionally, factors such as broom size, weight, and the number of slots in the holder should be considered to ensure a proper fit and efficient organization of your garage space.
Discuss the various types of broom holders (wall-mounted, magnetic, adhesive, etc.)
Wall-mounted, magnetic, adhesive, and other types of broom holders are available to effectively organize and store brooms in the garage.
These various broom holders offer different features and benefits to suit individual needs.
A comparison of these types is shown in the table below:
| Type | Features | Benefits |
|---|---|---|
| Wall-mounted | Secured to the wall with stainless steel screws | Provides a sturdy and durable storage solution for heavier brooms |
| Magnetic | Equipped with double rubber grips that securely hold metal tools | Allows for easy access and quick retrieval of frequently used cleaning tools |
| Adhesive | Uses strong adhesive backing to attach to any smooth surface | Offers flexibility in positioning, without causing damage to walls |
These broom holders can also be combined with other storage solutions such as catchall cleaning closets or larger cleaning tool racks.
By utilizing these different types of broom holders, individuals can efficiently store their oft-used cleaning supplies and keep their garage neat and organized.
Permanent Hangers
There is the classic “mop clip” which ranges in price from $3 up to $40.
There is no specific advantage to the more expensive ones they usually are more aesthetically pleasing.
They also will hold more mops or brooms. nonetheless, this can cause you to have a mop spacing issue which we discussed above.
If you need an example of what a standard mop clip looks like, click here.
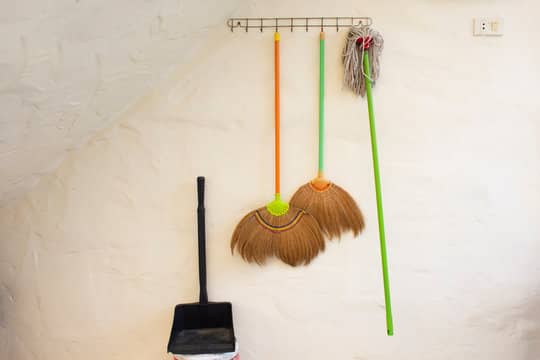
After purchasing your mop clip. Find a door such as inside your utility closet or your bathroom door.
Screw in the broom hooks, and voila the compact way to hang your mop for quick access.
If you have a closet that has a wire rack. You can go to your local hardware store for several “S” hooks.
The top of the “S” hook will loop over the wire rack. The bottom of the “S” hook will be for your mop.
You can also purchase your wire racks at your local home store.
This will allow a more personalized option for someone looking to have a specific cleaning closet.
As well as some wire racks have existing hooks for your mop.
Temporary Hangers
If you live in an apartment or a temporary home.
The thought of drilling holes in the wall isn’t very appealing. You also probably want that deposit back.

If you have multiple mops or have extra storage space in a closet. Go to your local hardware store to purchase a curtain rod.
Install the curtain rod between the two walls in your closet. Pick up some “S” hooks as mentioned above.
Loop the top over the curtain rod and the bottom of the “S” hook will be for the mop.
The curtain rod technique is useful because it is a simple fix to adjust how high or low you need to hang the mops. No drills or screws are necessary.
Many companies offer adhesive strips that have hooks. The adhesive strips also have been tested to handle the weight of your mop.
If you purchase one of these just to get home and realize your hook is too large or small for the broom hole. No worries.
Take a simple zip tie through your broom handle hole, pull the zip tie through but keep the zip-tie loose enough so it reaches around the hook.
Just like that problem solved.
If you want a prettier look than zip ties. Pick out your favorite fabric, and cut out a few strips to tie through the broom handle hole that gives you enough slack to put over the hook.
This will beautify your cleaning closet
onsider factors like broom size, weight, and number of slots in the holder
Factors such as broom size, weight, and the number of slots in the holder should be considered when selecting an appropriate storage solution for cleaning tools.
When deciding how to hang brooms in the garage, it is important to choose a holder that can accommodate different broom sizes.
Additionally, considering the weight of the brooms is crucial to ensure that the holder can support them without bending or breaking.
The number of slots in the holder is also an important factor to consider, as it determines how many brooms can be stored efficiently.
By organizing tools with a suitable holder, hooks or storage system, floor space in the garage can be maximized while keeping brooms easily accessible.
This not only helps keep the garage tidy but also ensures that cleaning tools are stored safely and in a convenient manner.
Installing the Broom Holder
When installing a broom holder in the garage, it is important to measure and mark the positions for mounting accurately.
This ensures that the broom holder is placed at the right height and distance from other objects.
In addition, using appropriate tools such as a screwdriver, drill, and level is crucial for proper installation.
Following step-by-step instructions carefully will help ensure that the broom holder is mounted securely and can effectively hold multiple brooms in place.
Measure and mark the positions for mounting the broom holder
Firstly, it is important to accurately measure and mark the positions for mounting the broom holder in the garage.
Utilizing storage tricks such as wall tracks, a shoe organizer, or a standalone cabinet can help keep your brooms organized and easily accessible.
To ensure proper location, consider marking spots where the brooms will be mounted based on their height and length.
Additionally, take into account any other items that may need to be stored nearby, such as fishing rods or a mop bucket.
When selecting separate walls for mounting the broom holder, choose areas that are sturdy and capable of supporting the weight of multiple brooms.
Also, consider whether you have unfinished walls that may require additional reinforcement before installation.
By measuring and marking these positions accurately, your garage will remain clean and well-organized on a consistent basis.
Use appropriate tools (screwdriver, drill, level) for installation
To ensure proper installation, it is essential to utilize appropriate tools such as a screwdriver, drill, and level.
These tools will aid in creating a secure and stable mounting for the broom holder.
When using a screwdriver, make sure to choose one that fits the screws provided with the broom holder to avoid stripping or damaging them.
A drill can be used to create pilot holes for easier screw insertion and increased stability.
Additionally, using a level will help ensure that the broom holder is properly aligned and straight on the wall.
By following these steps, you can easily install the broom holder in your garage without any hassle.
- Use a screwdriver that fits the screws
- Create pilot holes with a drill
- Utilize a level for proper alignment
- Ensure secure and stable mounting
Follow step-by-step instructions for mounting the broom holder securely
Transitioning from the previous subtopic, which emphasized the importance of utilizing appropriate tools during the installation process, we now delve into following step-by-step instructions for mounting the broom holder securely.
This crucial aspect ensures that brooms are safely and efficiently stored in the garage.
Expert advice provided by John Keeble highlights the primary reasons behind meticulously adhering to these instructions.
By doing so, individuals can optimize their use of space within their garages while also safeguarding larger supplies such as garden tools or colorful cleaners.
Furthermore, meticulous attention to detail is required when working with different types of surfaces like concrete floors or scrap wood.
Following precise instructions guarantees that brooms remain organized and easily accessible, reducing clutter and improving overall functionality within the garage environment.
Arranging Brooms on the Holder
When arranging brooms on the holder, it is important to organize them by size and type for easy retrieval.
This ensures that you can quickly locate the specific broom you need without wasting time searching through a jumbled mess.
Additionally, make sure to securely place each broom in its designated slot or hook to prevent them from falling or getting damaged.
A well-organized broom holder will not only keep your garage tidy but also prolong the lifespan of your brooms.
Organize brooms by size and type for easy retrieval
Organizing brooms by size and type facilitates easy retrieval in the garage.
By categorizing brooms based on their size and type, one can create a systematic arrangement that allows for quick identification and access.
This approach ensures that the right broom is readily available when needed, saving time and effort.
To begin organizing, group brooms according to their length or handle size, placing shorter ones at the front and longer ones towards the back.
Additionally, separate different types of brooms such as push brooms, corn brooms, or dustpans into distinct sections for enhanced organization.
Labeling each section can further enhance efficiency by providing clear visual cues.
By implementing this methodical system of organizing brooms by size and type, individuals can optimize their garage space while ensuring convenient access to the desired cleaning tool.
Place each broom securely in its designated slot or hook
To ensure optimal organization, securely place each broom in its designated slot or hook within the designated area.
This step is crucial in maintaining a tidy and clutter-free garage.
When placing the brooms, it is important to consider their size and type.
Larger brooms should be hung on sturdy hooks, while smaller ones can be accommodated in slots.
Ensure that the slots or hooks are appropriately labeled for easy identification and retrieval.
By securely placing each broom, you prevent them from falling or getting tangled with other tools or equipment, thus prolonging their lifespan.
Additionally, this organized system allows for quick access to specific brooms when needed, saving time and effort during cleaning tasks.
Remember to periodically check the placement of the brooms to maintain orderliness in your garage space.
One suggestion is to use labeled hooks for specific brooms or cleaning tools, which can make it easier to locate the desired item quickly.
It is also beneficial to utilize extra hooks for dustpans, mops, or other garage tools, ensuring everything has its designated place.
Lastly, keeping frequently used brooms within reach and placing less used ones higher up can help maximize efficiency and space utilization in the garage storage area.
Consider using labeled hooks for specific brooms or cleaning tools
Labeled hooks can be employed in the garage to designate specific brooms or cleaning tools.
By utilizing labeled hooks, organization and efficiency can be enhanced within the storage space.
Each hook can be assigned with a clear label indicating the type of broom or cleaning tool it is intended for, such as a push broom, a whisk broom, or a mop.
This allows for easy identification and access when needed.
Furthermore, labeled hooks help prevent confusion and mix-ups among different tools, ensuring that each item has its designated place.
When implementing this storage solution, it is important to choose durable hooks that can securely hold the weight of the brooms or cleaning tools.
Additionally, placing the labeled hooks at an appropriate height will ensure convenient accessibility while maximizing available space in the garage.
Utilize extra hooks for dustpans, mops, or other garage tools
Utilizing additional hooks in the storage area can provide designated spaces for dustpans, mops, or other tools commonly used in a garage setting.
This not only helps to keep the area organized and clutter-free but also ensures easy accessibility when needed.
Here are five items that can be hung on extra hooks in the garage:
- Dustpans: Hanging dustpans on hooks keeps them off the floor and prevents them from getting lost or damaged.
- Mops: By hanging mops on hooks, they can dry properly and be readily available for use without taking up valuable floor space.
- Brooms with long handles: These can be conveniently stored by hanging them vertically on hooks, preventing them from falling over or getting entangled with other items.
- Rakes and shovels: Hooks are perfect for holding these garden tools securely, preventing accidents caused by leaning against walls or falling onto the floor.
- Extension cords: Hanging extension cords on hooks prevents tangling and allows for easy access when needed.
By utilizing additional hooks in the garage, you can create an orderly storage system that maximizes space efficiency while keeping essential tools readily accessible.
Keep frequently used brooms within reach and less used ones higher up
To ensure efficient organization and accessibility in the storage area, it is recommended to keep frequently used brooms within reach while placing less used ones at higher positions.
By adopting this strategy, garage owners can optimize their space utilization and minimize clutter.
Placing frequently used brooms within easy reach allows for quick access when needed, saving time and effort.
This ensures that cleaning tasks can be completed promptly without any unnecessary delays.
On the other hand, less used brooms can be stored at higher positions to make room for more frequently utilized tools.
This systematic arrangement not only maximizes space but also prevents accidents such as tripping over items left on the floor.
Additionally, keeping less used brooms higher up ensures that they are out of the way but still easily accessible when required for specific cleaning purposes.
Safety Considerations
When considering the safety of hanging brooms in the garage, there are two key points to keep in mind.
Firstly, it is essential to ensure that the broom holder is firmly attached to the wall.
This will prevent any accidents or damage caused by a loose or unstable holder.
Secondly, it is important to verify that the broom slots or hooks can hold the weight of the brooms without bending or breaking.
This will ensure that the storage solution remains functional and safe for long-term use.
Ensure the broom holder is firmly attached to the wall
To ensure the broom holder is firmly attached to the wall, it is essential to use appropriate mounting hardware and follow recommended installation guidelines.
The first step in securely attaching a broom holder to the wall is to select the right type of mounting hardware.
It is crucial to choose screws or anchors that are suitable for the weight and size of the brooms being hung.
Additionally, it is important to locate studs or use a stud finder when installing the broom holder, as this will provide a stronger foundation for attachment.
When positioning the broom holder on the wall, ensure that it is level and centered before marking drilling points.
Finally, using a drill with an appropriate drill bit size, create holes at these marked points and secure the broom holder tightly against the wall using provided screws or anchors.
By following these steps diligently, one can ensure that their broom holder remains firmly attached without any risk of falling off or causing damage.
Verify that the broom slots/hooks can hold the weight of the brooms
To ensure the brooms are securely hung in the garage, it is crucial to verify that the broom slots/hooks can support the weight of the brooms.
This step ensures that the brooms will not fall or become damaged over time.
When assessing the capacity of the slots/hooks, consider the following factors:
- Material: Check if the broom holder is made of sturdy and durable materials such as metal or heavy-duty plastic.
- Size: Ensure that the slots/hooks are wide enough to accommodate different types of broom handles.
- Design: Look for slots/hooks with deep grooves or secure clamps to prevent any slippage or accidental dislodging.
- Weight rating: Verify if there is a specified weight limit for each slot/hook and make sure it exceeds the combined weight of your brooms.
- Installation method: Confirm that the slots/hooks are firmly attached to a stable surface using appropriate screws or brackets.
By carefully considering these aspects, you can confidently hang your brooms in a safe and organized manner in your garage.
Maintenance and Upkeep
Maintenance and upkeep of broom holders is crucial to ensure their longevity and proper functionality.
Regularly checking the broom holder for any signs of wear or loosening is essential in order to prevent accidents or damage.
Additionally, it is important to clean both the broom holder and the brooms themselves as needed, removing any dirt or debris that may accumulate over time.
Regularly check the broom holder for any signs of wear or loosening
Regularly inspect the broom holder in the garage for any indications of deterioration or loosening.
This is crucial to ensure that your brooms are securely hung and readily accessible when needed.
To effectively maintain your broom holder, consider implementing the following steps:
- Examine the screws: Check if they are tightly secured to prevent any potential loosening over time.
- Evaluate the plastic components: Look for cracks or signs of wear on the mounting brackets, clips, or hooks.
- Inspect the rubber grips: Ensure they are still intact and providing sufficient grip to hold the brooms firmly in place.
- Test overall stability: Gently tug on each broom handle to confirm that all attachments and fasteners are secure.
By regularly checking these aspects of your broom holder, you can identify any issues early on and take appropriate measures to address them promptly, ensuring a safe and organized storage solution for your garage tools.
Clean the broom holder and brooms as needed
Cleaning the broom holder and brooms as needed ensures a hygienic storage solution for your cleaning tools.
Regular maintenance of these items not only prolongs their lifespan but also helps maintain their functionality.
To begin, inspect the broom holder for any signs of dirt, dust, or debris accumulation.
If present, use a damp cloth or sponge to gently wipe away any visible residue. Pay particular attention to the crevices and corners where dirt may accumulate.
Next, turn your attention to the brooms themselves. Remove any loose hair or debris by hand before proceeding with cleaning.
For synthetic bristle brooms, soak them in warm soapy water and scrub gently with a soft brush to remove any stubborn stains.
Rinse thoroughly and allow them to air dry before returning them to the broom holder.
For natural fiber brooms, avoid submerging them in water as it can damage the fibers; instead, use a clean cloth or towel dipped in mild soapy water to spot clean stains or spills.
Following these steps will help ensure both your broom holder and brooms remain clean and ready for use at all times while maintaining optimal hygiene standards in your garage storage area.
Frequently Asked Questions
Can I use a broom holder for other tools besides brooms?
A broom holder can be used for organizing and storing various tools besides brooms.
Its design allows for the hanging of different items such as mops, rakes, shovels, and other long-handled tools in a neat and efficient manner.
How do I clean the broom holder?
To clean a broom holder, first remove the tools from it.
Then, use a damp cloth or sponge with mild soap to wipe down the holder, paying special attention to any dirt or debris.
Allow it to dry completely before reattaching the tools.
Can I install the broom holder on a door instead of the wall?
Installing a broom holder on a door instead of the wall is feasible.
However, it is important to ensure that the door can support the weight and that the installation does not hinder the door’s functionality.
What should I do if the broom holder doesn’t fit my brooms?
If the broom holder does not fit your brooms, you may consider alternative storage options such as wall hooks or a hanging system specifically designed for different types of cleaning tools.
Is it necessary to use a stud finder when installing the broom holder?
Using a stud finder to install a broom holder in the garage is not necessary but recommended.
It ensures that the holder is securely attached to a stud, providing maximum support and preventing potential damage to the wall.
Final Words
In conclusion, effectively organizing and hanging brooms in the garage can greatly optimize storage space and ensure a clutter-free environment.
By assessing the available garage space, choosing the right broom holder, preparing the garage wall, and installing the holder correctly, one can easily arrange brooms in an orderly manner.
It is important to consider safety measures and regularly maintain the broom storage area to ensure its functionality.
Just as a well-organized garage allows for smooth movement of vehicles, a properly hung broom symbolizes efficiency and cleanliness in our daily lives.