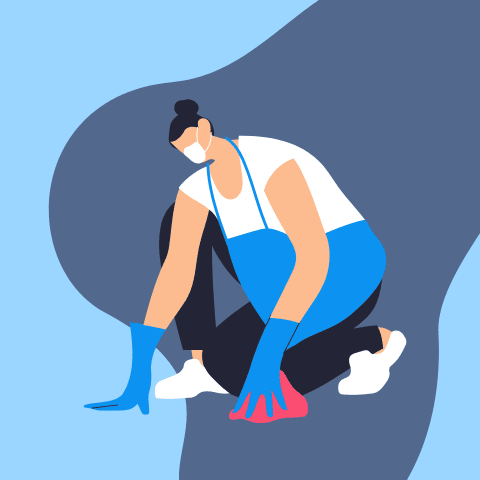
Mop Not Effectively Removing Bacteria or Germs (Explained)
Proper mopping technique and equipment are vital for lifting dirt and grime that harbor dangerous microbes. When not done effectively, bacteria and viruses remain, spreading sickness through contact. By understanding common mistakes and fixes, readers can protect their homes.
This guide will cover:
Why Proper Mopping Matters
Bacteria and viruses from unhygienic floors can lead to infection and disease. Mops lift and absorb microbes when used correctly.
Common Mopping Mistakes
Ineffective mopping fails to sanitize floors. We will explore frequent errors in mop choice, cleaning solution, method, maintenance, and more.
Equipment and Methods for Proper Germ Removal
The right mops, buckets, cleaners, and techniques lift bacteria off floors for a safer home.
Preventing Recontamination After Mopping
Sanitizing floors means little if they quickly collect germs again. Tips to keep floors clean longer.
FAQs on Mops and Germ Removal
Answers to common mopping questions for better understanding.
By the end, readers will know how to thoroughly eliminate bacteria with proper mopping. Let’s get started!
Why Proper Mopping Matters
Floors harbor bacteria, viruses, mold, and other microbes that cause illness. Frequent mopping removes these threats. When done incorrectly, germs remain to infect residents.
On average, there are 200 times more fecal bacteria on a cutting board than a toilet seat. Thorough mopping eliminates these risks.
Dangers of Germs on Floors
Microbes on unclean floors spread disease through:
- Ingestion – Bacteria enters the body through hand-to-mouth contact after touching floors.
- Inhalation – Mold spores are inhaled after dispersing into air from floors.
- Open wounds – Infections occur when cuts or sores contact contaminated floors.
- Cross-contamination – Germs transfer from floors to other surfaces like countertops when touched.
Who is Most at Risk?
Some groups face higher chances of sickness from dirty floors:
- Young children – More likely to put hands or objects in mouth after floor contact.
- Elderly – Weaker immune systems cannot fight infections well.
- Pregnant women – Increased vulnerability to bacteria-related illnesses.
- Those with wounds – Open cuts/sores easily infected from floor germs.
Proper mopping protects all residents, especially at-risk groups.
Common Mopping Mistakes
Many unknowingly use incorrect techniques or equipment resulting in floors still containing illness-causing germs after mopping.
Ineffective Mop Types
Sponge mops simply move bacteria around floors instead of lifting and absorbing them.
Flat mops like traditional string types often miss dirt and germs in cracks and crevices.
Mops without absorbent heads leave excess moisture where microbes thrive.
Solution: Use microfiber mop heads which lift and trap particles other materials leave behind. The ultra-fine fibers penetrate cracks. They also quickly absorb water and dry fast to discourage bacterial growth.
Harsh Chemical Cleaners
Some cleaners contain toxic ingredients unnecessary for safe sanitizing. These chemicals pose health risks, especially to children and pets.
Many conventional floor products also leave behind slippery residue when not thoroughly rinsed. This builds up over time, trapping dirt and recontaminating floors.
Solution: Opt for gentler, non-toxic cleaners free of ammonia, bleach, phosphates, etc. Look for plant-based, organic brands. For DIY options, white vinegar, hydrogen peroxide, essential oils or Castile soap diluted in water work well.
Not Pre-Cleaning Floors
Skipping pre-cleaning leaves behind stuck-on grime and too much bacteria for mops to fully eliminate.
Solution: Before mopping, thoroughly sweep, dust or vacuum floors. This removes excess dirt so mops only need to sanitize remaining germs. Pay special attention to corners and baseboards where particles accumulate.
Mopping Before Sweeping
Some mop dirty floors before sweeping up loose debris. This turns particles into muddy messes while spreading bacteria further across floors.
Solution: Always sweep or vacuum first. This lifts loose dirt for removal by dustpan or vacuum before mopping up remaining stuck-on messes.
Not Using a Bucket
Mopping without a bucket leads to excess dirty water left on floors along with germs. Excess moisture breeds bacteria.
Solution: Use two buckets for mopping – one to hold clean water and detergent for washing floors, another to rinse dirty mops. The rinse bucket allows dirty water removal rather than redistributing germs.
Dipping Dirty Mops in Clean Water
When mopping with a single bucket, it quickly becomes filled with dirty water. Continuing to soak and wring the mop here spreads filth across floors.
Solution: With a two-bucket system, mops soak in clean solution before wringing out over second bucket. This prevents dirty water transfer.
Not Removing Enough Water From Mops
Mops that are too damp after wringing leave excess moisture on floors. Puddles and damp areas become breeding grounds for bacteria and mold spores.
Solution: Thoroughly wring out mops until barely damp. Remaining moisture will evaporate fast without encouraging microbial growth. Test on small area first to gauge appropriate level of dryness.
Missing Areas Near Walls and Under Furniture
Tight spaces often get overlooked when mopping. Germs and dirt then accumulate, spreading through contact.
Solution: Move furniture to expose all areas for cleaning. Use angled mop heads or scrub brushes to reach corners and baseboards. Check walls and under appliances for any missed spots.
Not Cleaning Mops Afterwards
Reusing dirty mops transfers bacteria back to floors. Rinsed mops still contain germs deep in fibers.
Solution: Thoroughly wash microfiber mop heads with hot, soapy water after use. More frequent washing maintains absorption and scrubbing power. Replace heads every 3-6 months.
Skipping Disinfection
Regular mopping lifts surface-level grime but may not kill all illness-causing germs. Viruses and bacteria can still transfer to residents.
Solution: Periodically disinfect floors instead of just cleaning. This kills remaining bacteria missed by regular mopping. Mix equal parts water and bleach or other antimicrobial cleaner. Let solution sit on floor for 5-10 minutes before rinsing.
Equipment and Methods for Proper Germ Removal
Now that we’ve covered common mistakes, let’s discuss proper mopping tools and techniques to effectively eliminate floor bacteria.
Recommended Supplies
Gather these cleaning essentials before mopping for floors free of illness-causing germs:
- Microfiber mop – Ultra-fine fibers scrub floors clean while absorbing moisture and bacteria. Angled designs simplify reaching corners and baseboards. Stiff scrub bristles lift tough stains.
- Two mop buckets – One with cleaning solution, another to wring dirty mops minimizing contamination. Get buckets with wheels for easy transport and mesh wringers to thoroughly squeeze out excess liquid.
- Broom and dustpan – Removes loose dirt and debris before mopping so grime isn’t spread around. Angled brooms simplify reaching corners and walls.
- Vacuum cleaner – For deeper cleaning carpets and rugs before mopping hard floors. Choose models with hose attachments for furniture and curtains.
- Cleaning solutions – Use plant-based organic brands free of harsh chemicals. Check ingredients to avoid irritants. Essential oil or vinegar-based DIY solutions also work.
- Scrub brush – Handheld brush for tough spots like gum, dried spills and debris stuck to baseboards. Look for sturdy bristles with ergonomic grip.
- Disinfectant (optional) – Hospital-grade disinfectants kill more germs than cleaners when deeper sanitizing needed. Bleach solutions work too.
Step-By-Step Mopping Method
Follow these steps for floors free of illness-causing bacteria and viruses:
- Sweep floors – Remove loose dirt, debris, dust and pet hair with broom and dustpan. Vacuum carpets/rugs beforehand.
- Fill bucket – Fill mop bucket with warm water and cleaning solution. Check label for proper dilution ratio.
- Soak mop head – Dip microfiber mop into bucket allowing head to absorb solution. Lift up/down to evenly distribute through strands.
- Wring thoroughly – Grab opposite ends of mop and aggressively twist to remove excess liquid. Repeat until head is damp but not dripping.
- Mop area – Scrub floors using figure-8 motions overlapping passes. Apply firm pressure to lift dirt from cracks and gaps.
- Rinse mop – Dip dirty mop into second bucket filled with clean water. Lift up/down and wring out until barely damp.
- Repeat steps – Mop additional sections until entire floor surface covered. Rinse mop each time before re-soaking in solution.
- Rinse floors – Fill bucket with clean water. Dip in mop and wring thoroughly. Use figure-8 motions to rinse floors and lift absorbed dirt.
- Detail clean – Scrub corners, baseboards, and tight spaces with brush. Use angled mop to reach areas under furniture.
- Air dry – Allow floors to completely dry to prevent slippery surfaces and bacterial growth in moisture. Place fans to speed up process.
- Wash tools – Rinse all mops, buckets, brushes, etc. Remove built-up residue. Disinfect microfiber mop heads in hot water or machine wash.
- Maintain – Sweep daily and mop floors twice a week for cleanliness between deep cleaning sessions.
Preventing Recontamination After Mopping
It’s frustrating to carefully mop floors only to have them quickly become dirty again. Here are tips to keep floors clean longer after sanitizing:
Remove Shoes at Entryways
Dirt, bacteria, chemicals and more transfer from footwear. Place removable rugs both inside and outside doors for easier cleaning. Provide shoe storage space.
Avoid Tracking In Outdoors Debris
Use door mats outside each entryway scraping shoes before entering. Choose rubber-backed mats that don’t slide and are easy to clean.
Close Off Rooms When Possible
Limit foot traffic over recently cleaned floors to keep dirt and germs at bay longer. This allows proper drying as well to prevent moisture-related issues.
Clean Up Spills Quickly
Don’t let new spills create stains and leave behind bacteria. Absorb what you can with paper towels then spot clean remainder immediately with brush, gentle cleaner and damp (not wet) mop.
Sweep and Vacuum Frequently
Regular quick cleanings lift surface-level dirt before it gets ground in. Schedule daily sweeping and vacuuming high-traffic areas.
Wash Kids and Pet Feet
Dirt easily transfers inside on little feet. Keep baby wipes by doors for quick wipe-downs. Have pets wipe paws before entering.
Use Floor Protectors
Attach felt pads to furniture legs prevent scratches and dents. This also minimizes dirt grinding into floors when pieces shift. Area rugs protect too.
Control Humidity Levels
Excess moisture encourages mold growth leaving floors potentially hazardous. Maintain 30-50% humidity indoors with dehumidifiers and fans.
FAQs on Mops and Germ Removal
Below are answers to common questions on mopping floors effectively:
How often should I mop floors?
For average homes, mop hard floors 1-2 times per week. High-traffic areas like entryways and kitchens may need cleaning more frequently, while lesser-used rooms can go longer between moppings. Always address spills immediately as well.
What’s the best mopping solution?
Plant-based cleaners and DIY options like vinegar, Castile soap or hydrogen peroxide work well. Check that formula is gentle enough for your floor type. Microfiber mops also lift plenty dirt using just water.
How do you sanitize floors without chemicals?
Mix equal parts water and regular bleach to create a natural disinfecting floor cleaner. White vinegar or hydrogen peroxide solutions also sanitize. Let sit 5-10 minutes before rinsing. Steam mops kill germs too.